CAPE HORN, THE NEW CHALLANGE

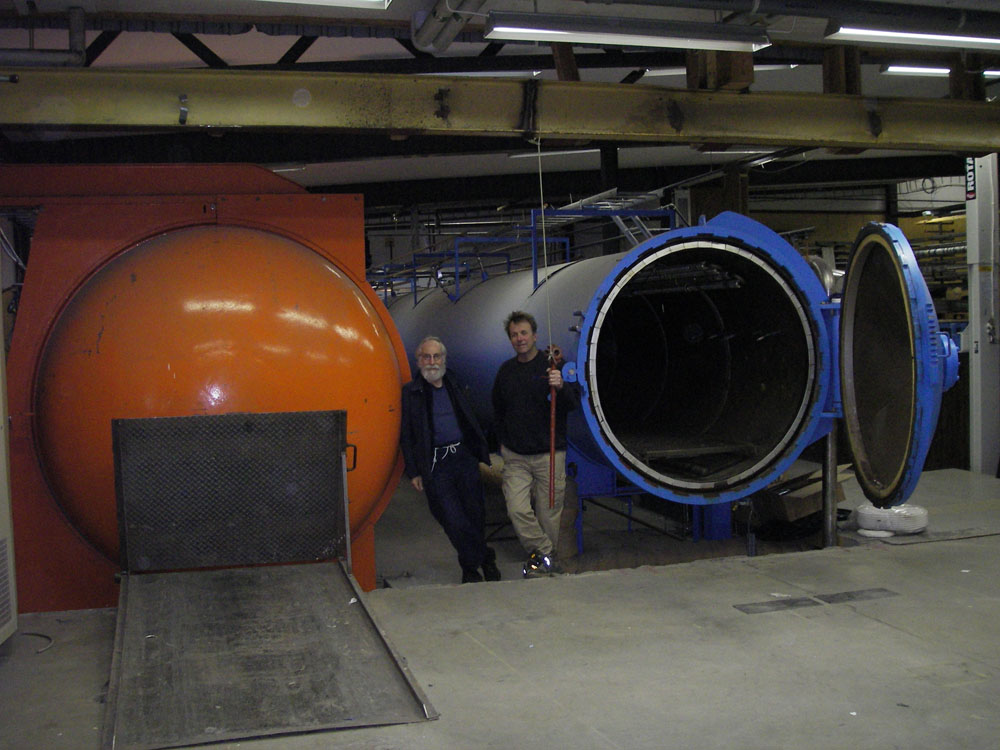
My plan was to sail Yrvind ½ to Australia, but after working with her for more than six months, finding ways to make her more weatherly and seaworthy I now think she is capable of more. I now like to try an east to west Cape Horn rounding in her.
I dont think that it will be easy, but I think if life is not difficult its not worth living. If you work to the limits of your capacity you do not get bored and you do not need entertainment and drugs.

The east to west rounding is called the wrong way. It is nothing wrong about it. Cape Horn earned its reputation by forcing Captain Bligh to give up, by giving the 1849ers who sailed to California looking for gold a harsh time. Going east about helped by wind and current is not the same achievement, nor is it to hide behind the nearby islands or in the Beagle Channel until you have a god weather report and then make a quick dash around.

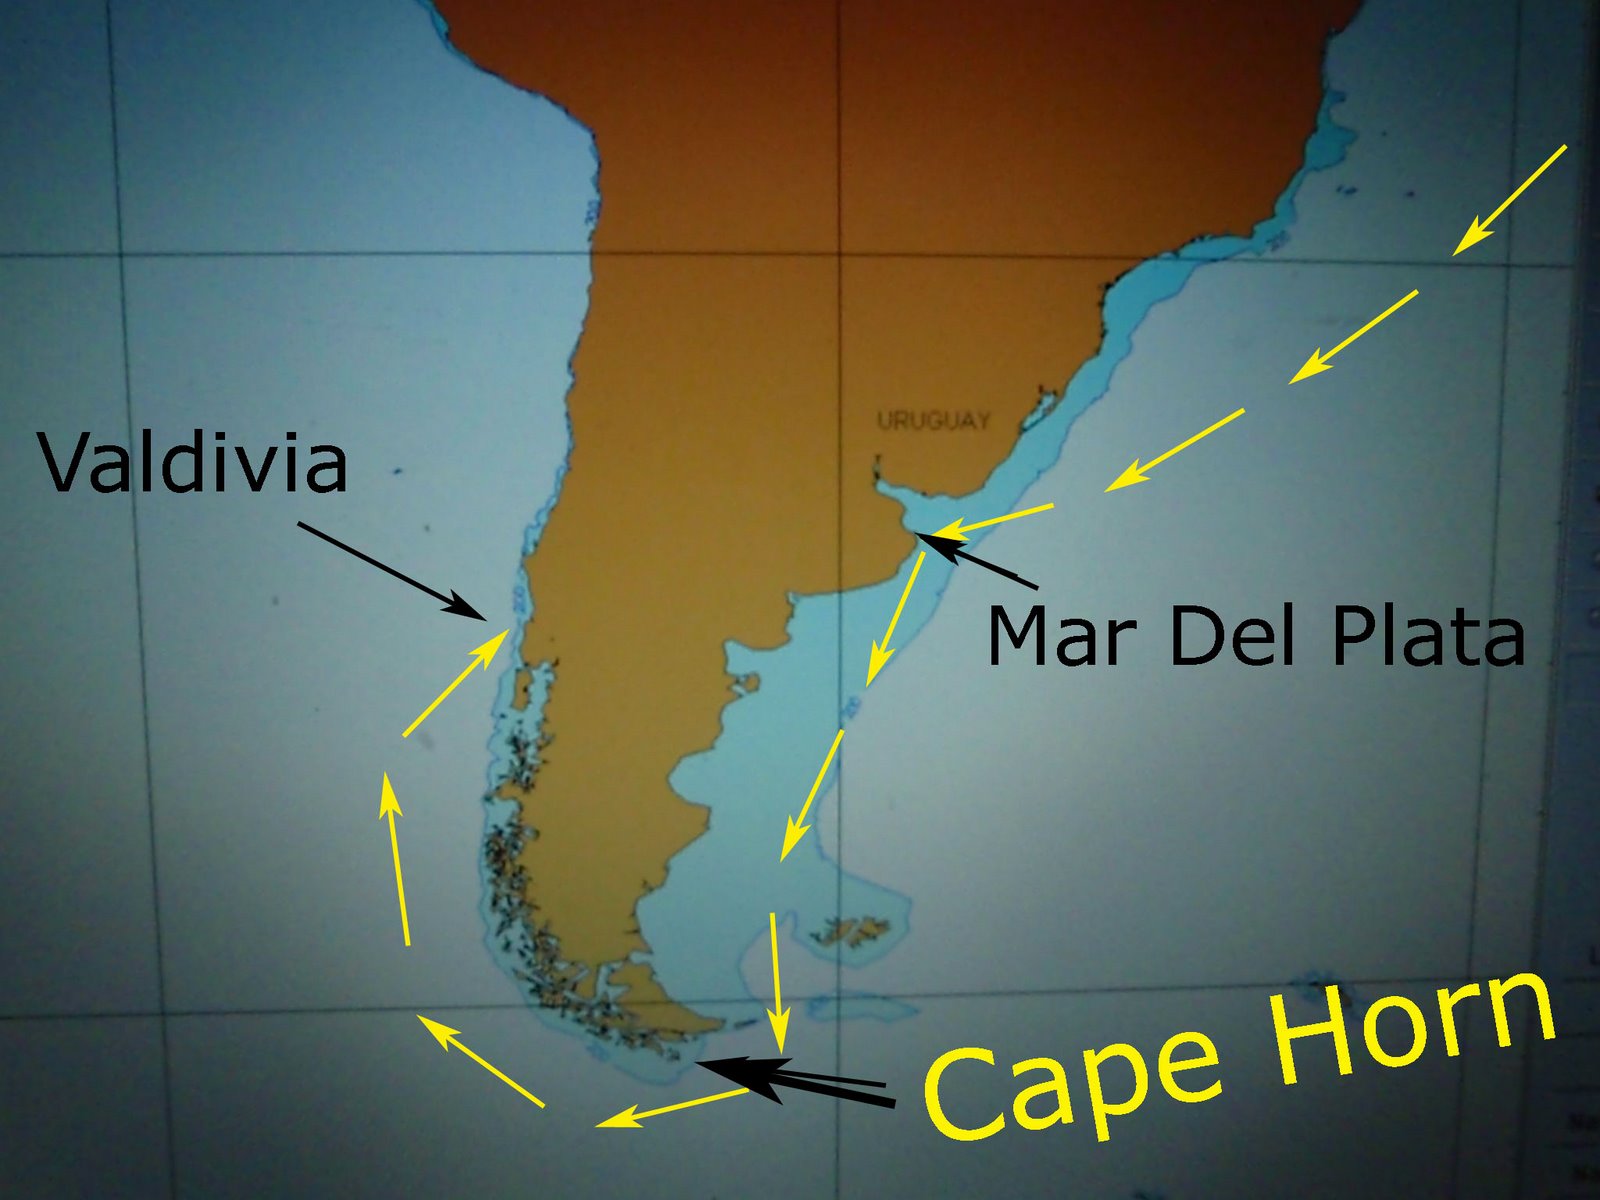
The sailing lores old and well established starting point is latitude 50 south in the Atlantic, its finishing point is latitude 50 south in the pacific. It is an east to west rounding.
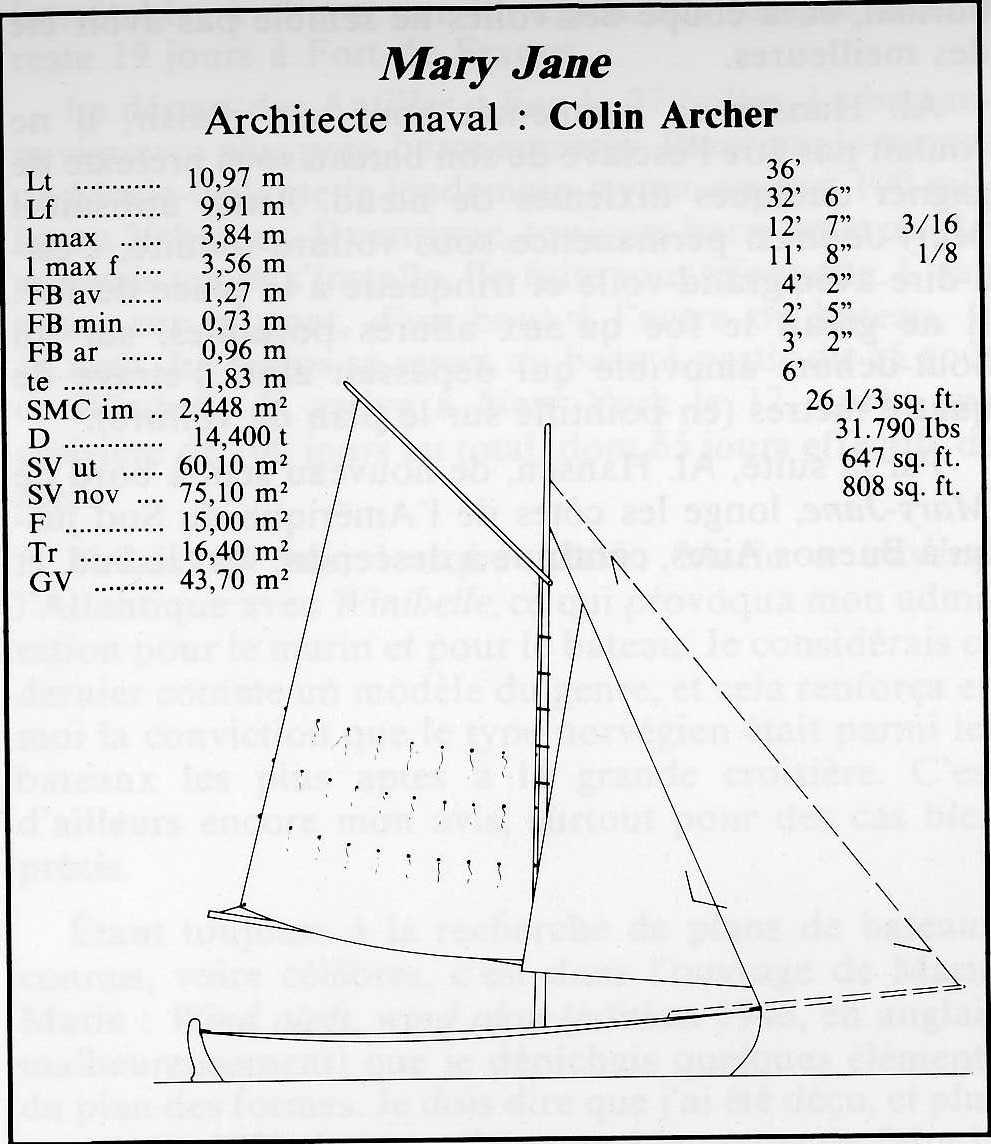
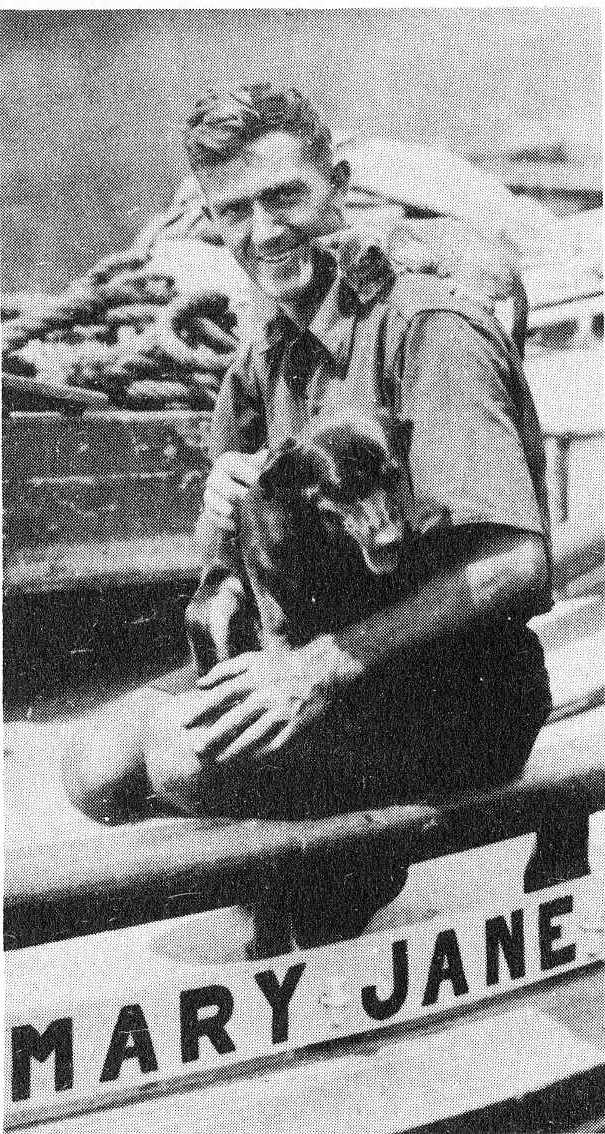
Singlehanded in a small boat that challenge is difficult. In fact to my knowledge only one person has succeeded doing that in a boat smaller than 60 feet. That person is Alfon Hansen from Norway. He sailed in Mary Jane a 36 feet gaff rigged Colin Archer. He had no engine. He left Buenos Aires in 1934. He arrived in Isla Chiloe 110 days later. After a brief rest he sailed north. He disappeared at sea in a storm. Only wreckage of Mary Jane was found.

Some people may think it is hubris to try to round the Horn in a much smaller boat, but i do not want to be remembered as a down wind sailor.

Below is my planned route, from Mar del Plata in Argentina to Valdivia in Chile.

Below is a photo of Al Hansen with his cat and dog.

Below if a a photo of Mary Jane.

Below is particulars of Mary Jane.

MORE WORK ON LOCKERS

The vertical subdivisions behind the side panels are now done.There are four on each side in the fore cabin and the same amount in the aft cabin. I have now also begun work on the shelves. There are nine lockers on each side in the fore cabin and six on each side in the aft cabin, a total of thirty. There are more than three hundred liters of stowage for books and food. There are also eight water jugs under the aft deck, five liters each, four on each side. They are connected to my water catchment system. A small slow boat on a long voyage needs a lot of secure stowage.

Below is a picture of the fore cabin. At the bottom of the picture on the starboard side can be seen the shelves, the horizontal division of the storage space, coming up.

Below is one of the shelves. The clamps hold iron angels which the shelves rest on. the lead piece holds the shelf in place while the fillets cure.

Before this was done I had made the lead chambers here is the six ones on the starboard side. There is a total of eighteen. At this moment the lead weights is being poured at Blomstermåla foundry. More about that later. Each weight is 14 kilos or about 31 pounds

VENTILATION FOR HEAVY WEATHER

My heavy weather ventilation system.
First I put in the two bulkheads.

The ventilation channels are built on the main bulkhead.

I wish I could draw as well as Matt. As it is you have to do with this. The top picture show the boat on even keel healing 0 degrees. The air comes in from the deck and is ducted in an L-shaped channel down and across the boat.

The middle picture shows the boat heeled 90 degrees. Part of the deck and one ventilator then comes under water. It flows down the channel, but the bottom part of the L is now vertical and the water gets no further.

The bottom picture shows the boat healed 180 degrees. Now the first part of the channel is vertical preventing water from entering the cabin.

This is the fundamental theory. However as air not only have to enter but also leave the cabin two sets of channels is necessary. Also to get distribution of the air the entry and outlet have to be as far away from each other as is practical. Therefore the second channel is an L with an added bend making it an U. With this arrangement air can enter at the bottom of the boat and leave at the top or vice verse. This demands a drain in the bottom of the U were water can be let out in the bilge after an capsize. I use two small carbon pipes.

As there is plenty of wind pressure in a gale my channels have a small section 3 by 4 centimeter roughly equivalent to 1 by 2 inches. Still they are much bigger than my nostrils.

I build the channels of 1 cm divinycell which I edgeglue to the bulkhead.

When the first U is done I do the second L. The also function as a seat.

Here the system is seen from above. When the deck house is built I will continue the channels to the top of it.

Here is a view from below. The two black carbon drainers can be seen.

SIDE PANELS

Below can be seen the side panels getting fitted. I sleep on the floor in the forward part of the boat. The read containers are NM-epoxy, but I use them as mock up for water containers donated by Mellerud Plast.

Below is the sleeping room. The lead chambers can be seen at the bottom the other openings are for stowage. The top of the plywood side panel is reinforced with a U-profile in carbon. It contains handhold’s which also serve to fasten my safety belts into. All the black stuff is carbon prepreg cured in Marströms big autoclaves. Thanks to Göran and Pers kindness I have the full run of their workshop.

Below is the aft part of the boat. There I will have a nice seat and big windows to give me a good look at all the interesting things outside the boat. At the forward end is the ventilation channels.

The side panels fits snugly into the ventilation channels. With an epoxy fillet and some fiberglass I get a strong bound.

Below the the stowage hatches gets a coat of epoxy to seal the plywood. Note that the top of my home made work bench is made of a one inch thick steel plate.

Below, last but not least, me and Göran Marström in fromt of the big autoklaves. Thank you Göran for all the help.