CONTROLING LINES FOR THE BOW CENTERBOARD

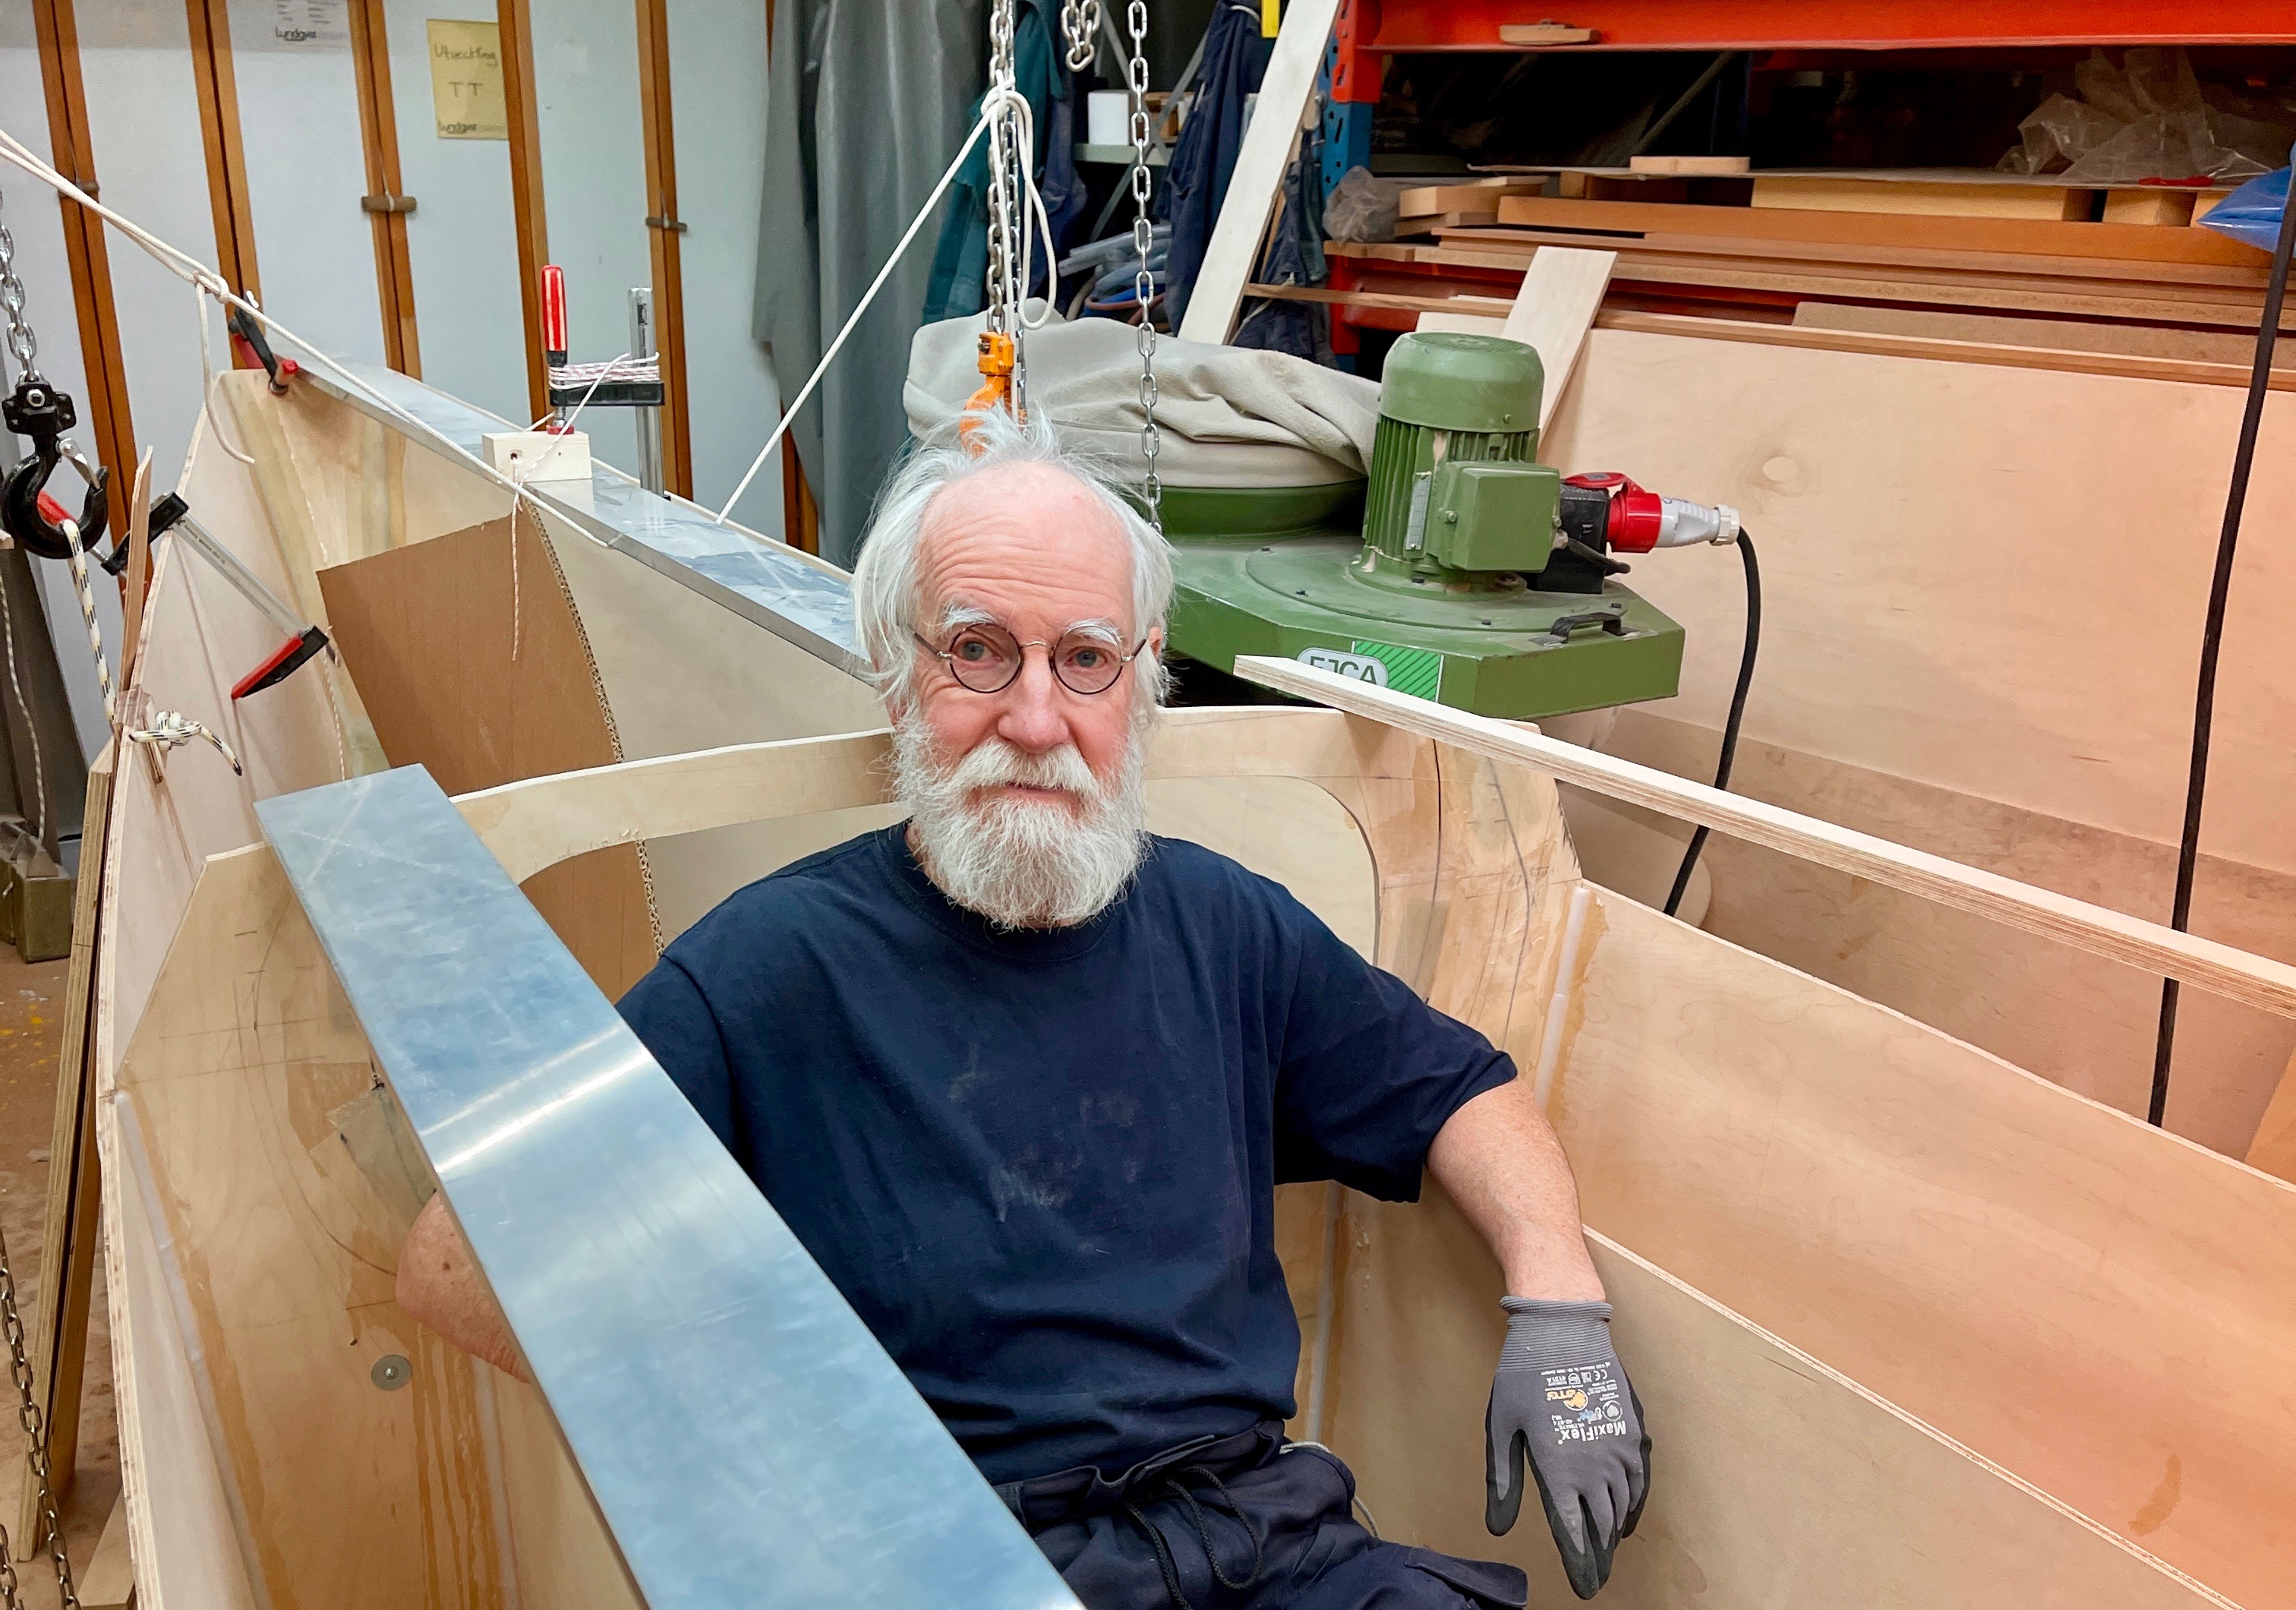
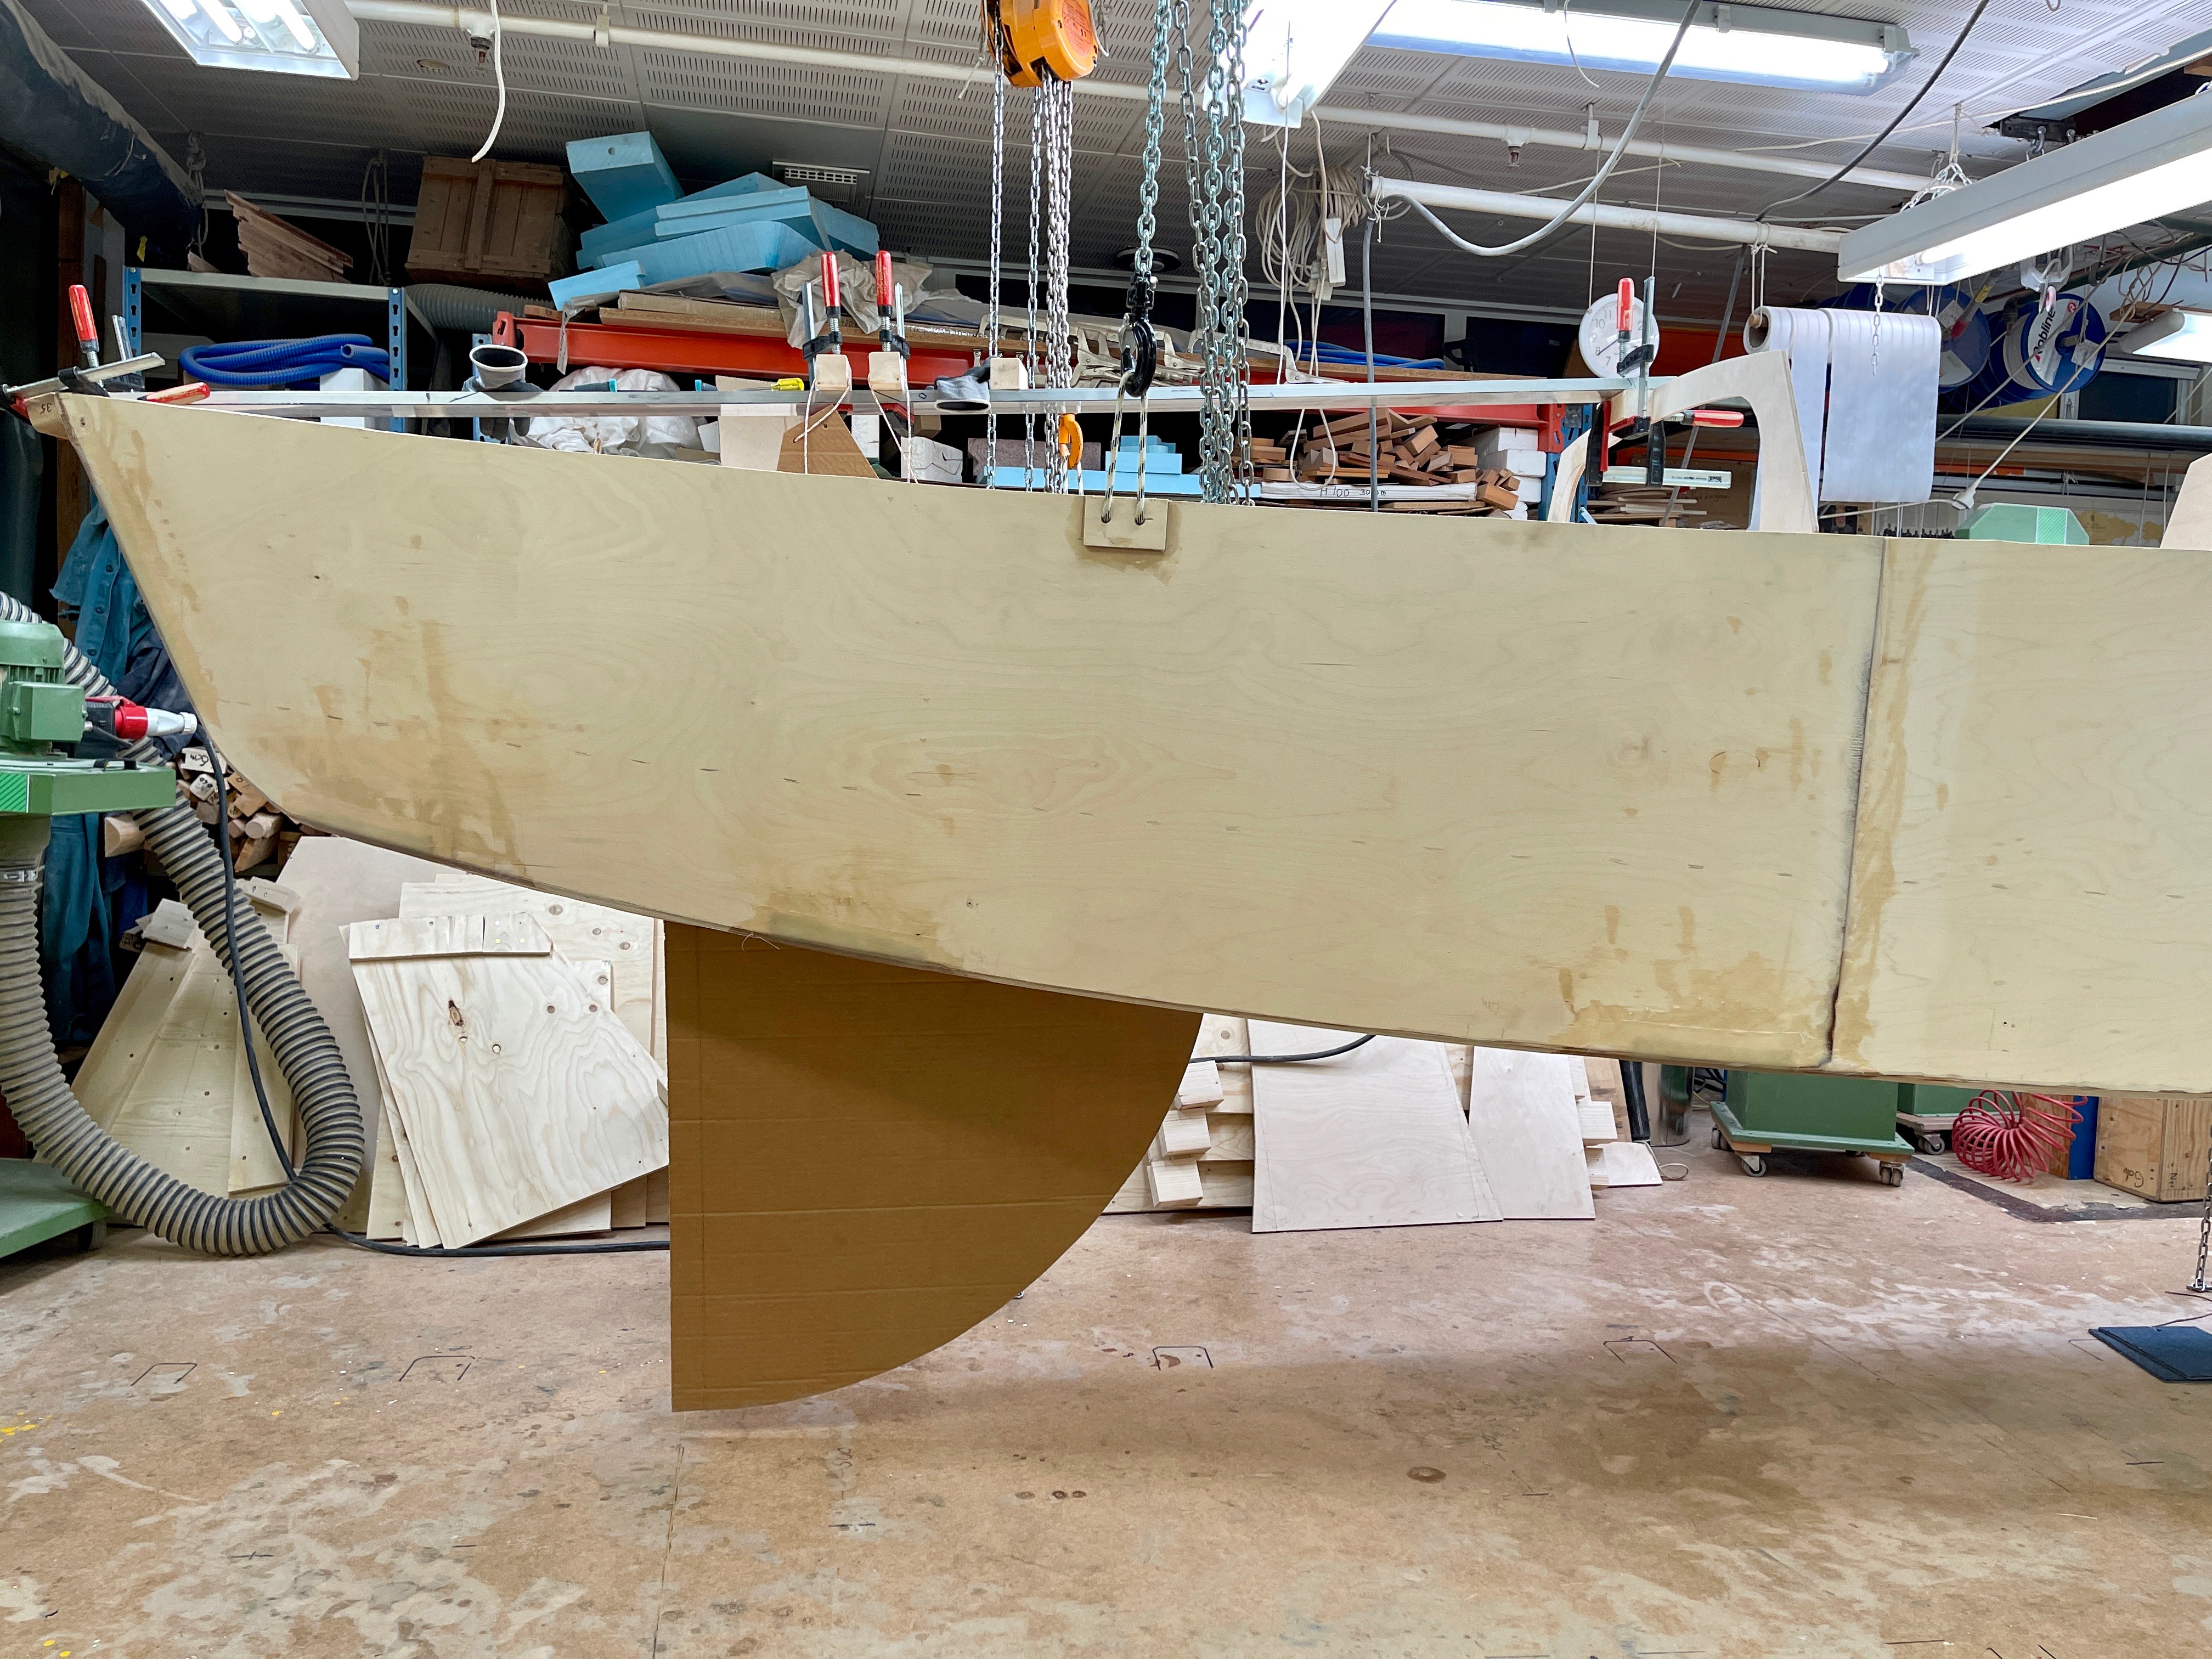
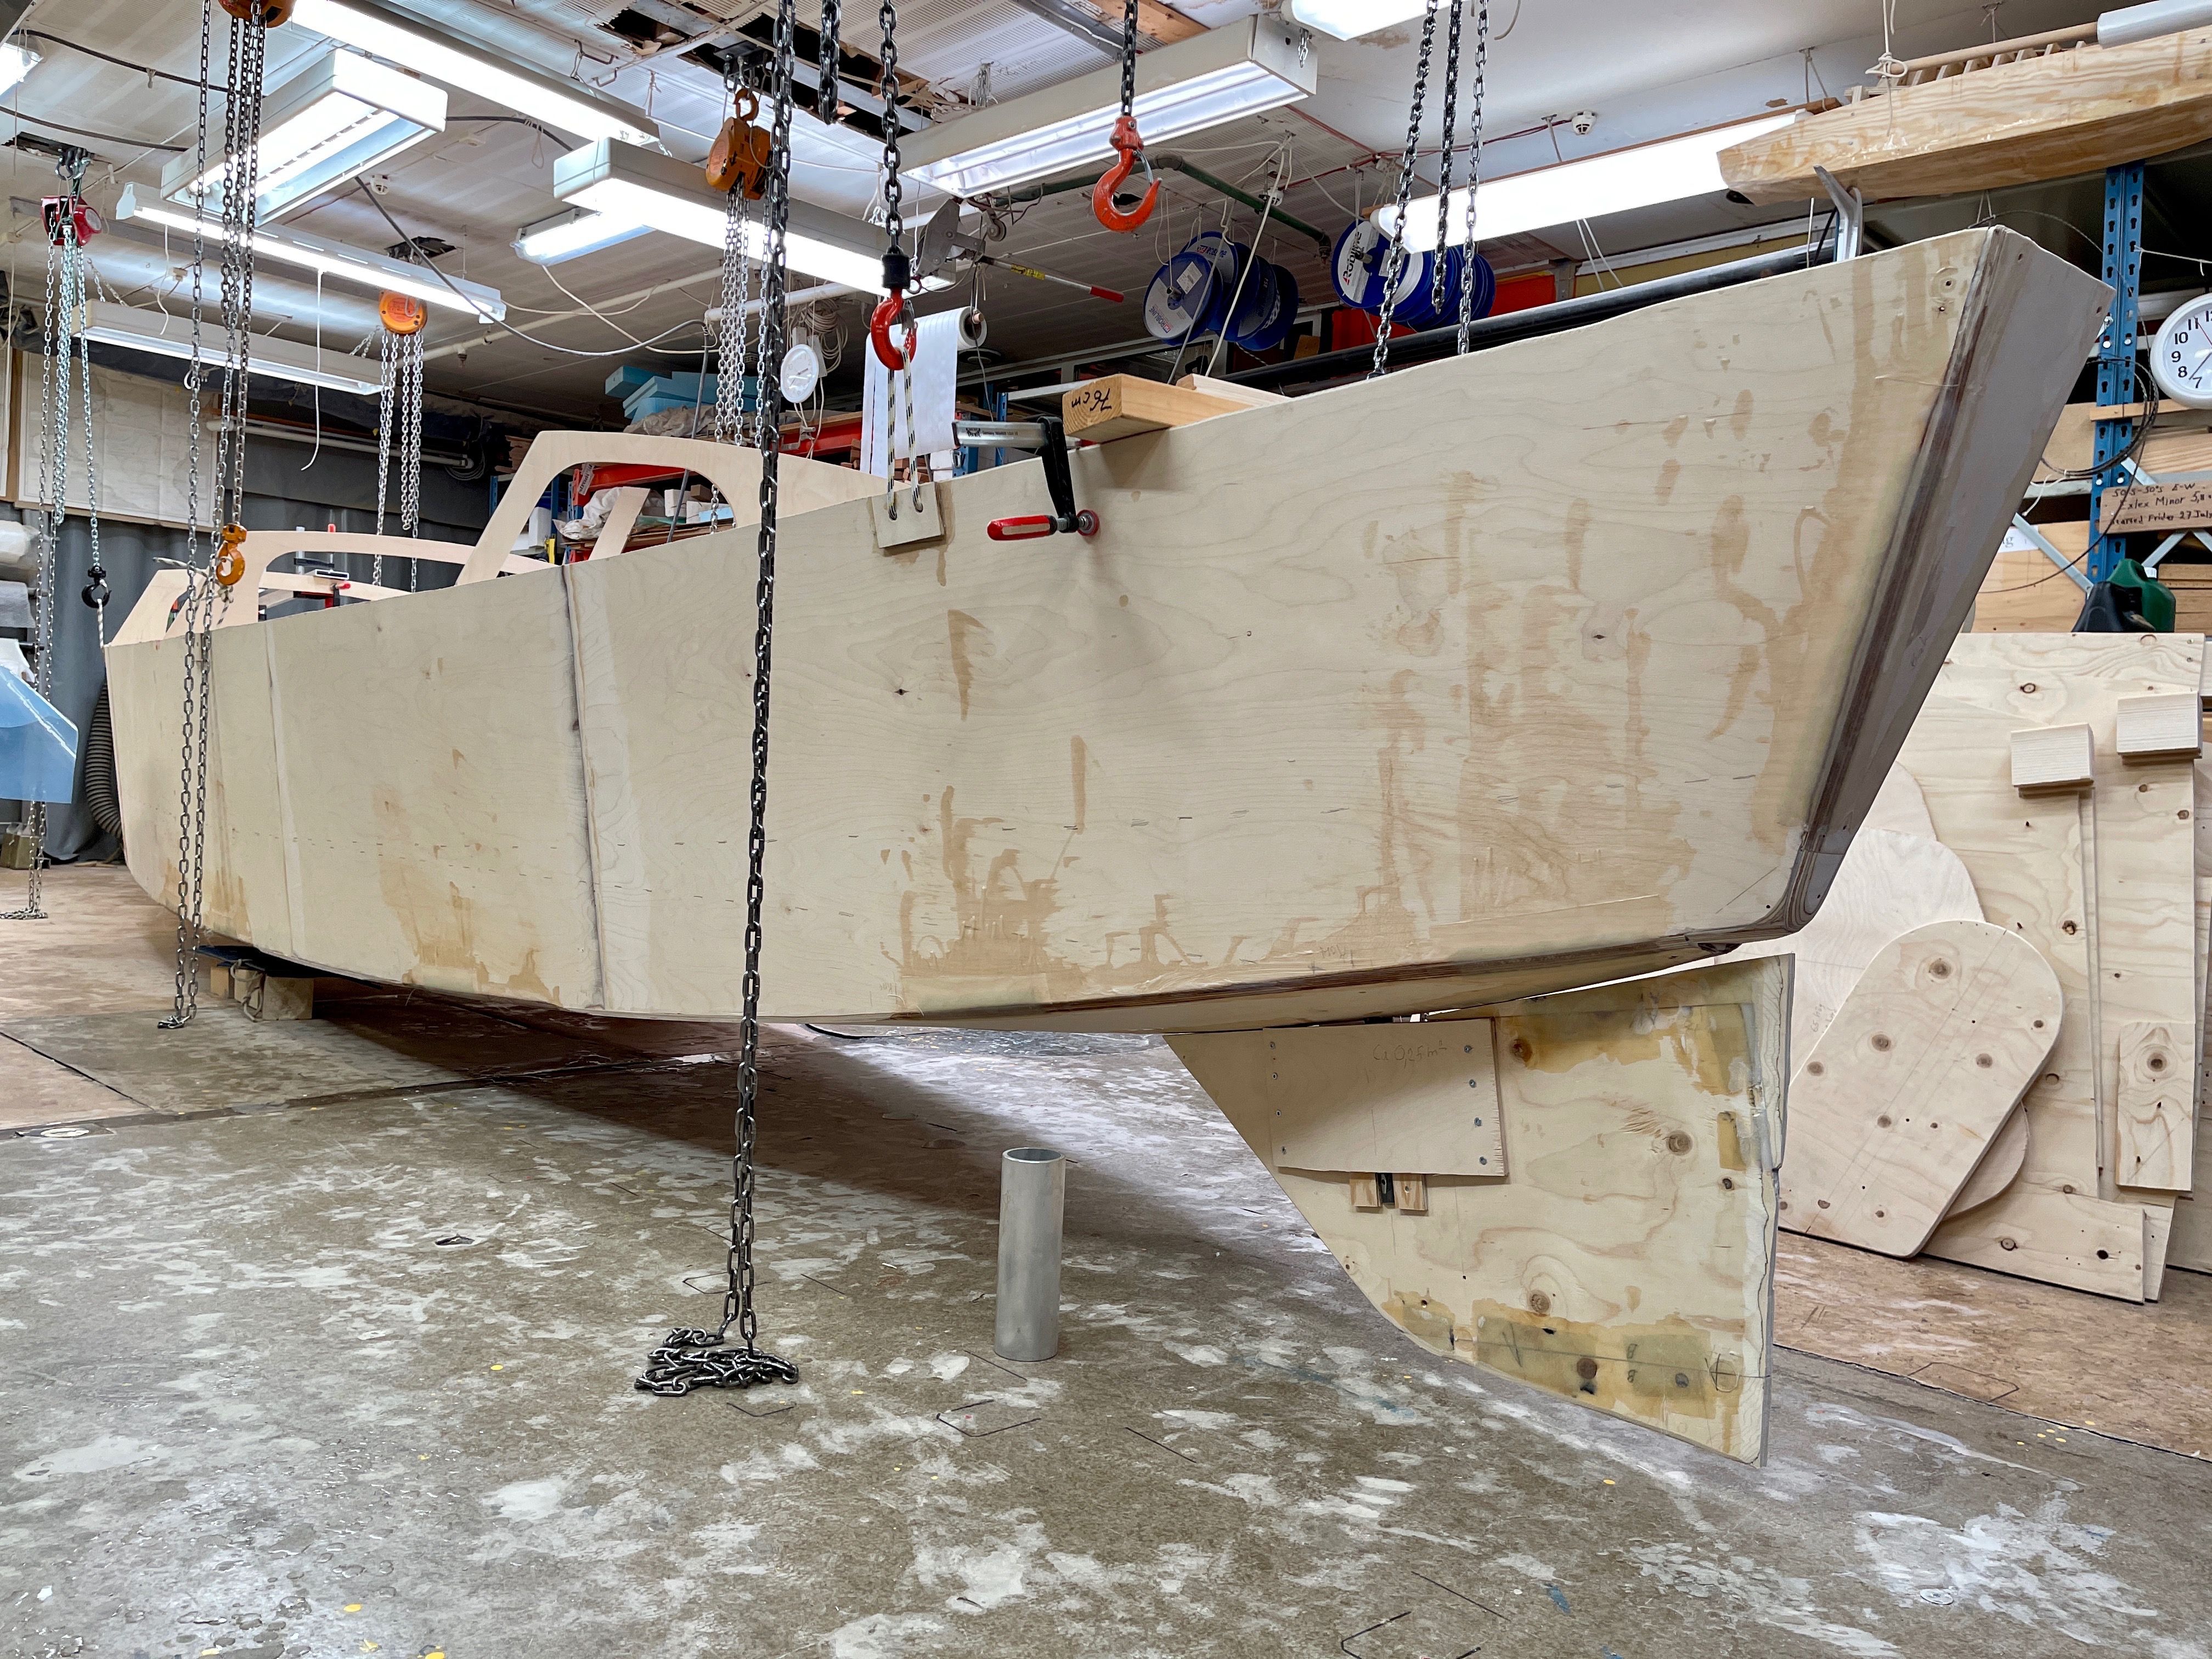
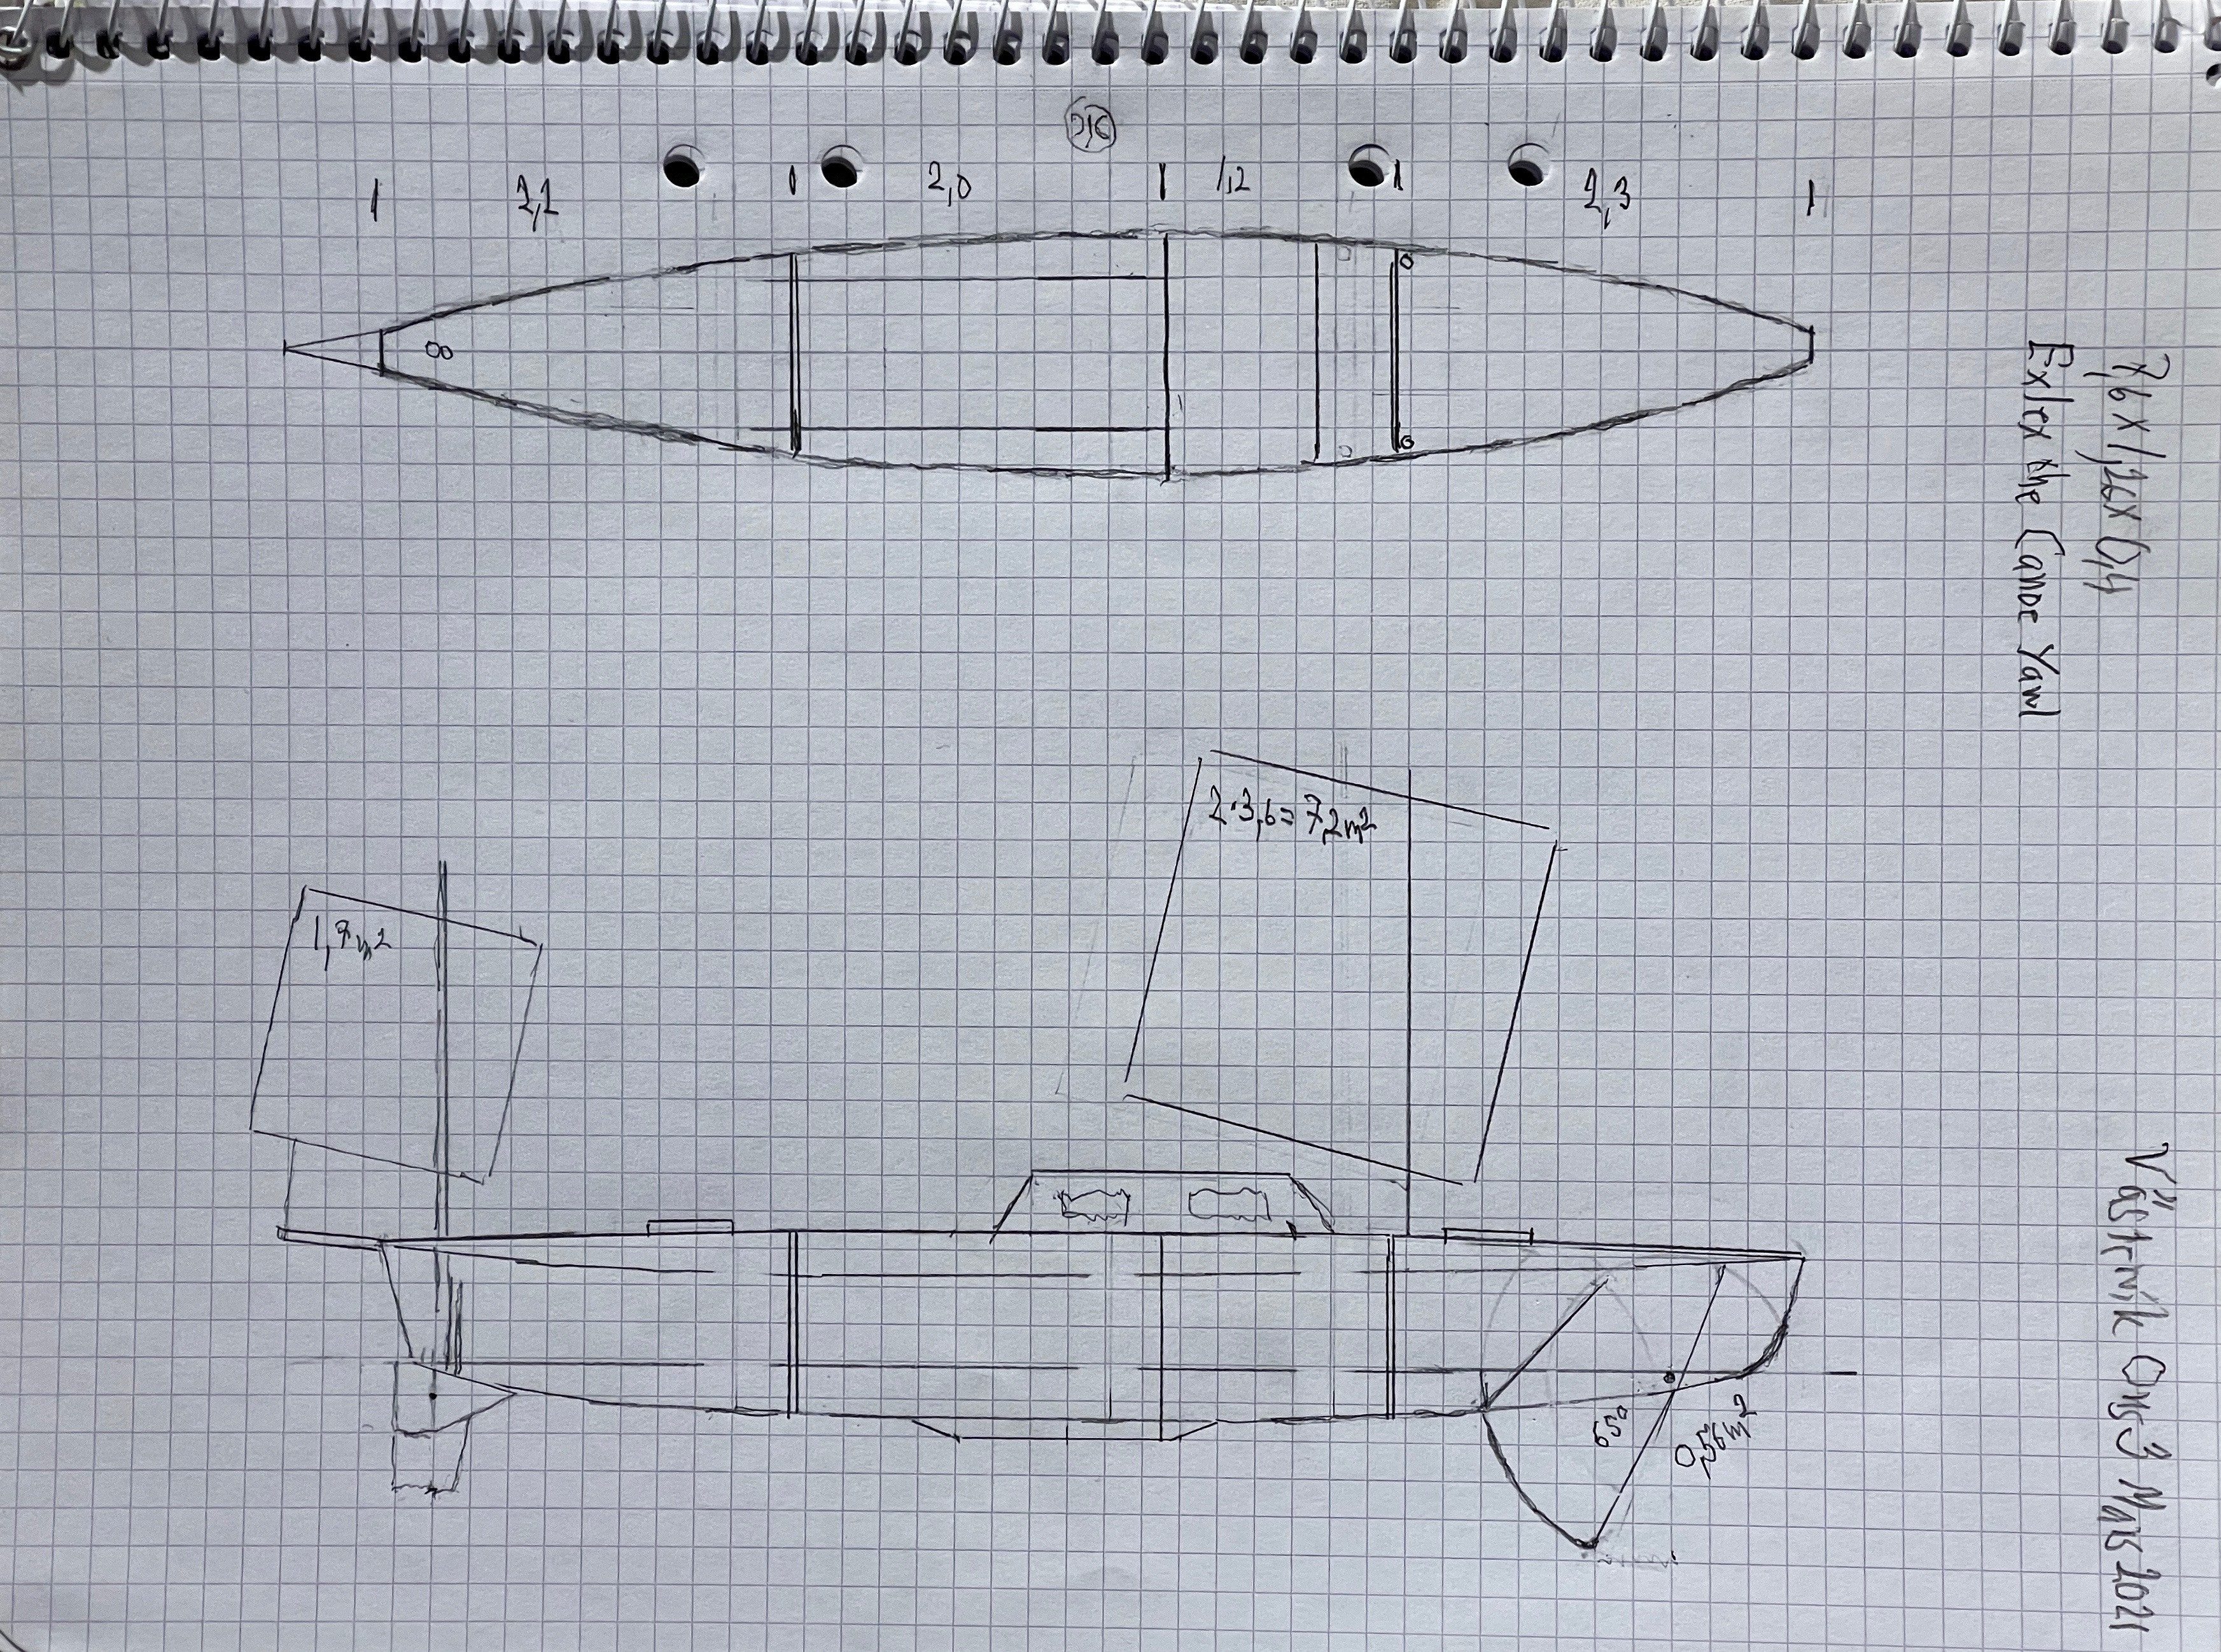
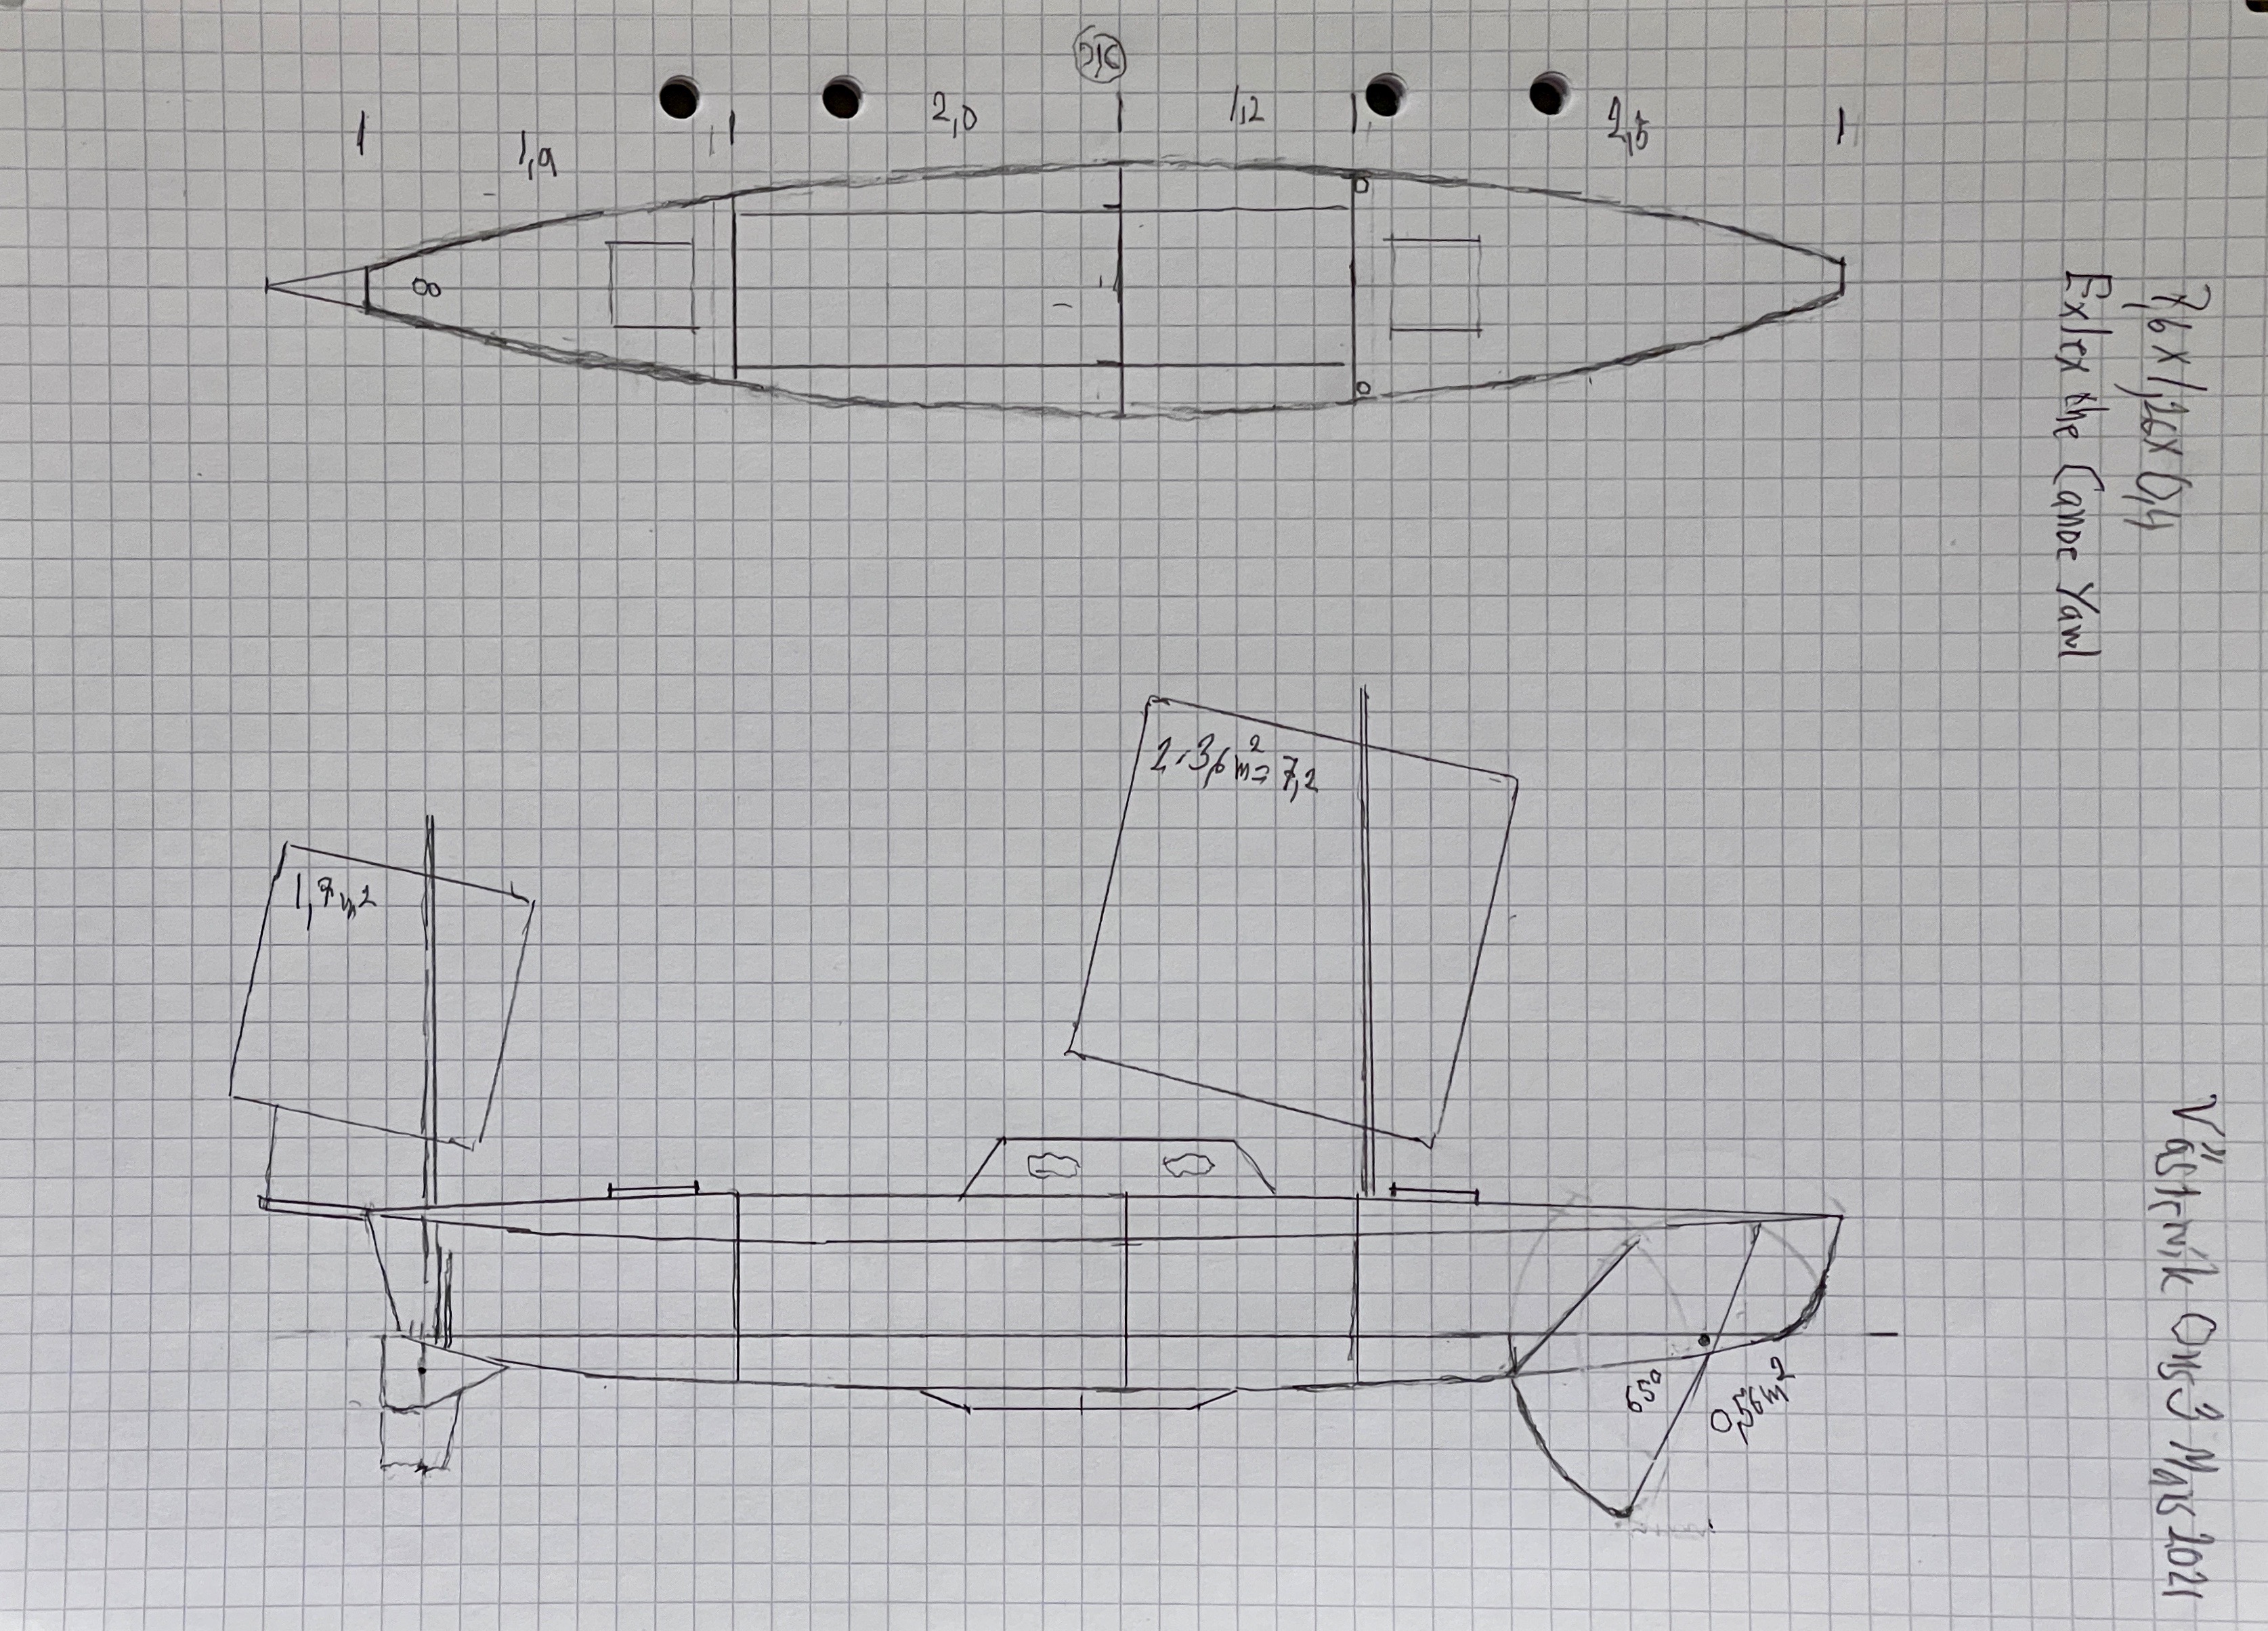
Exlex of 2018 and 2020 had daggerboads. They are simple to make but more complicated to control remotly with lines. On Amphibie Bris 15  feet long of 1989 I used a bow centerboard. I sailed her from France to Newfoundland. It worked well.

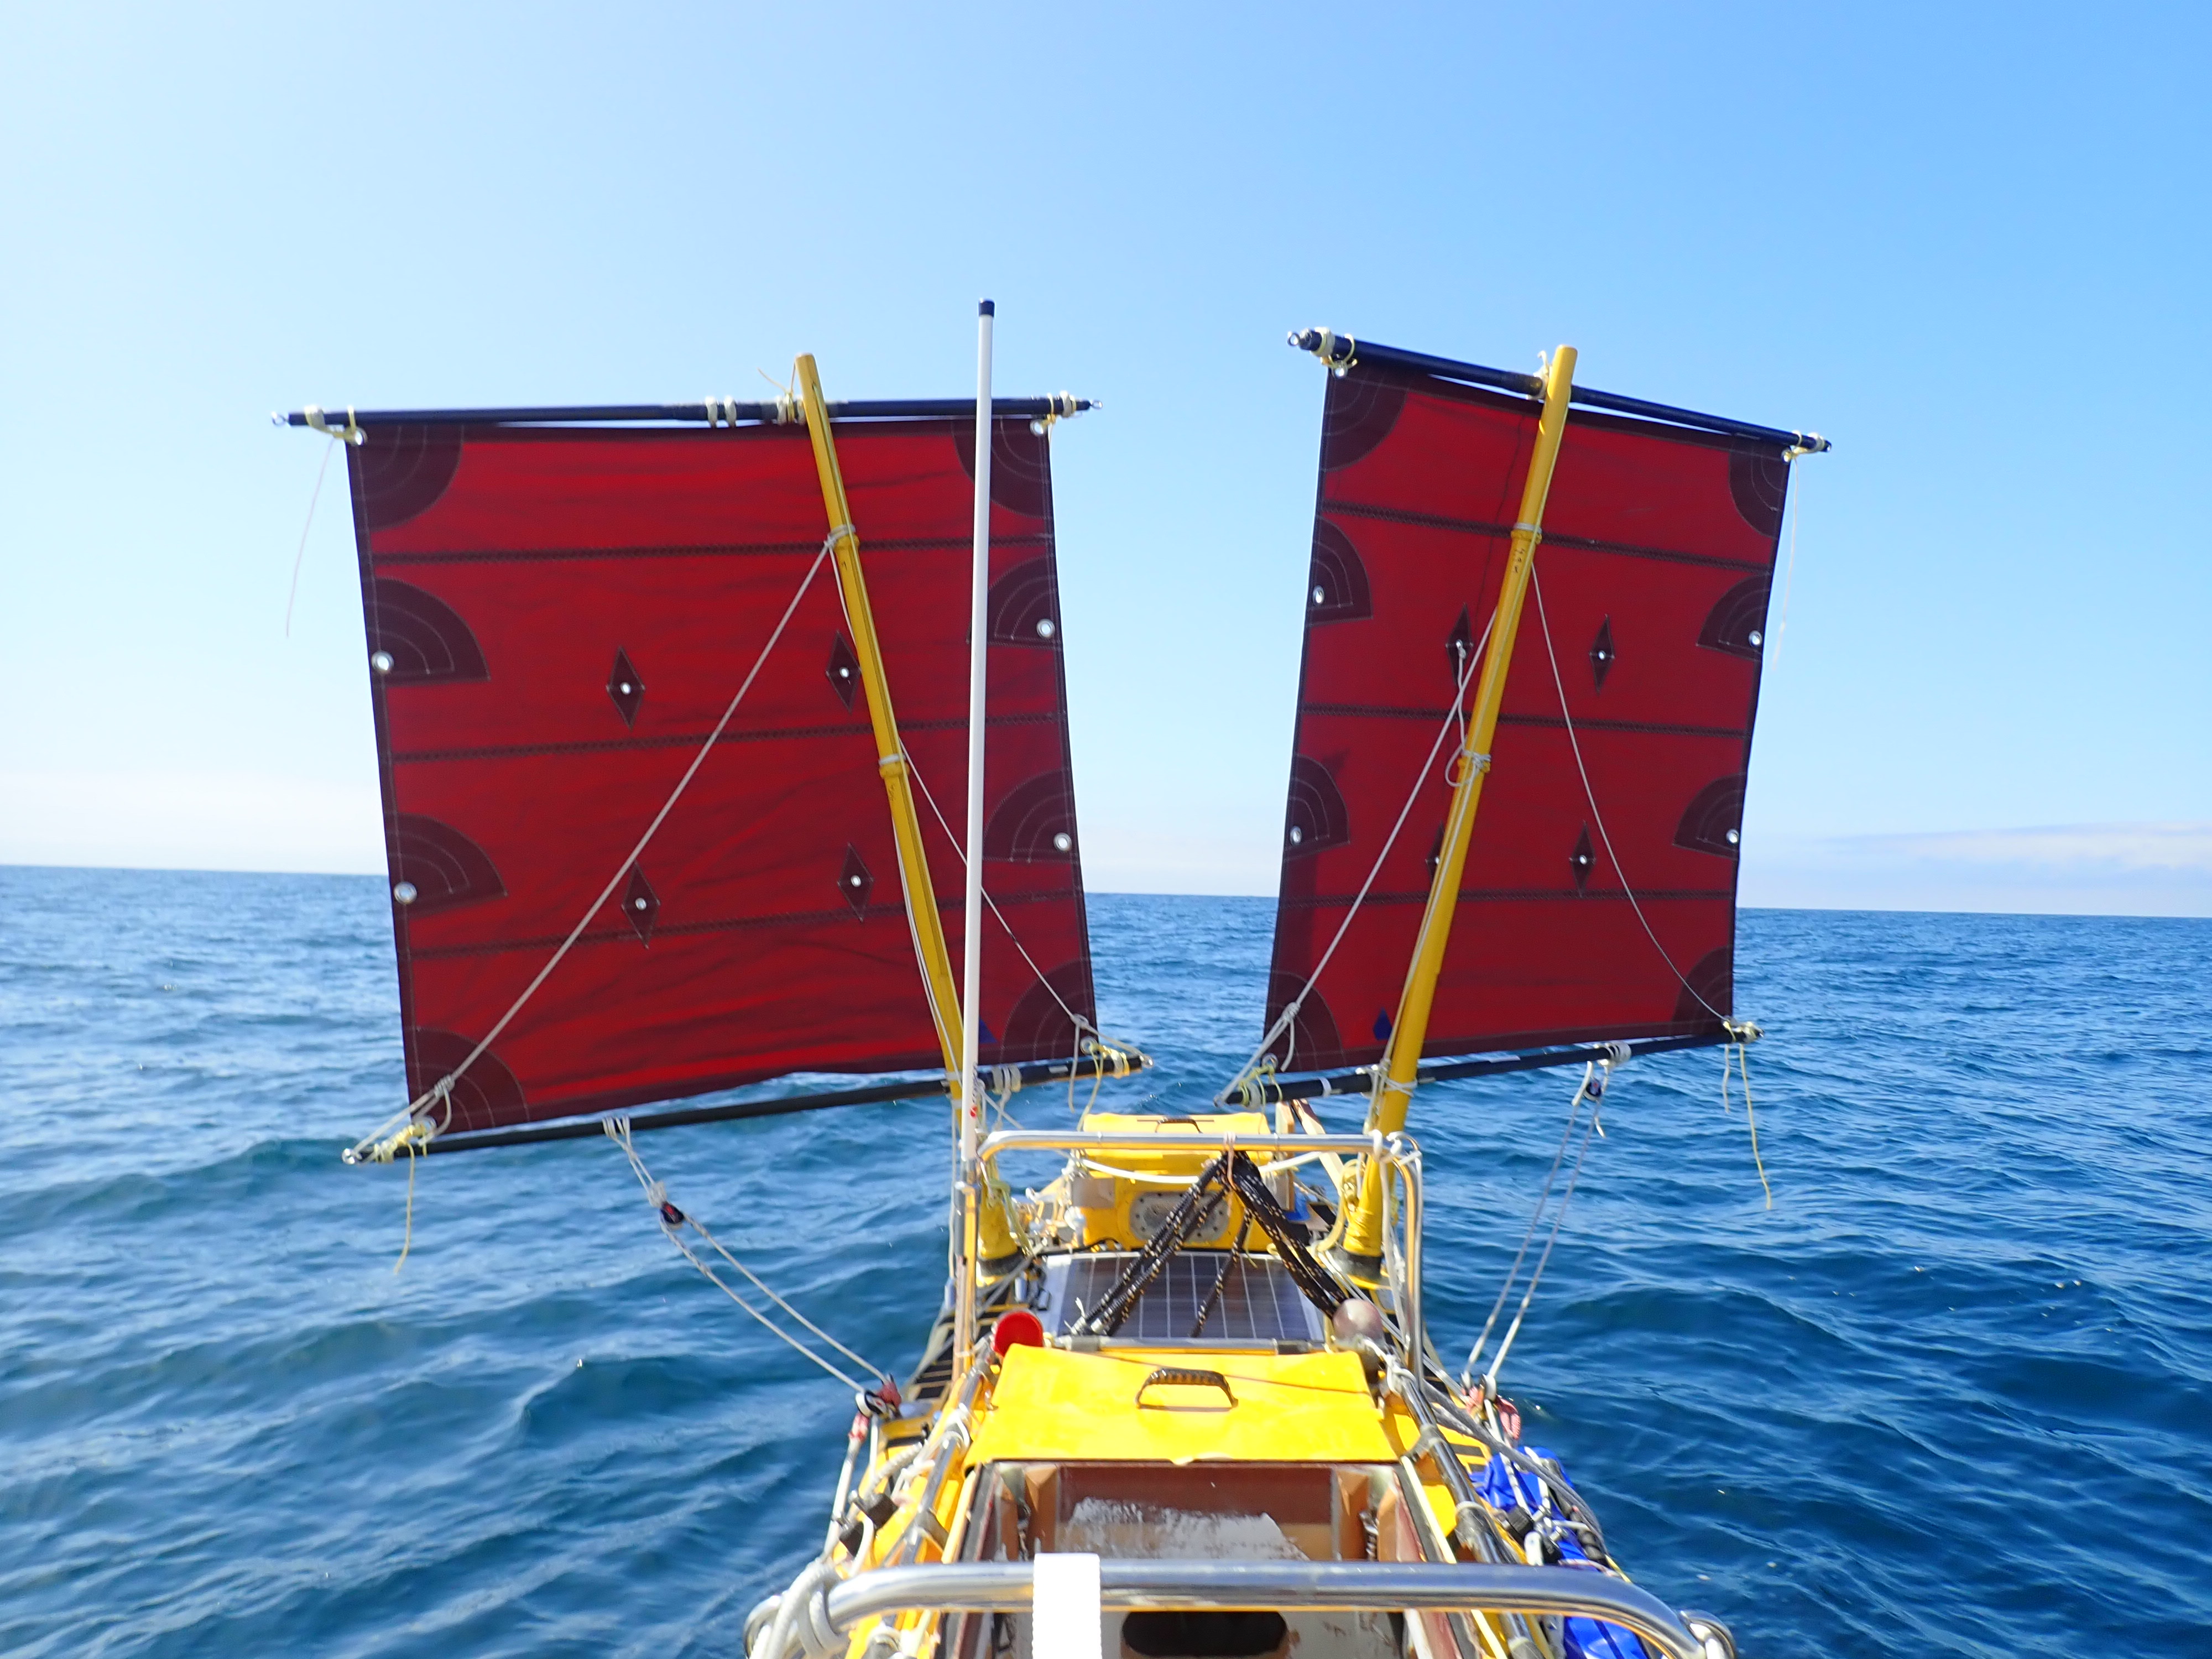
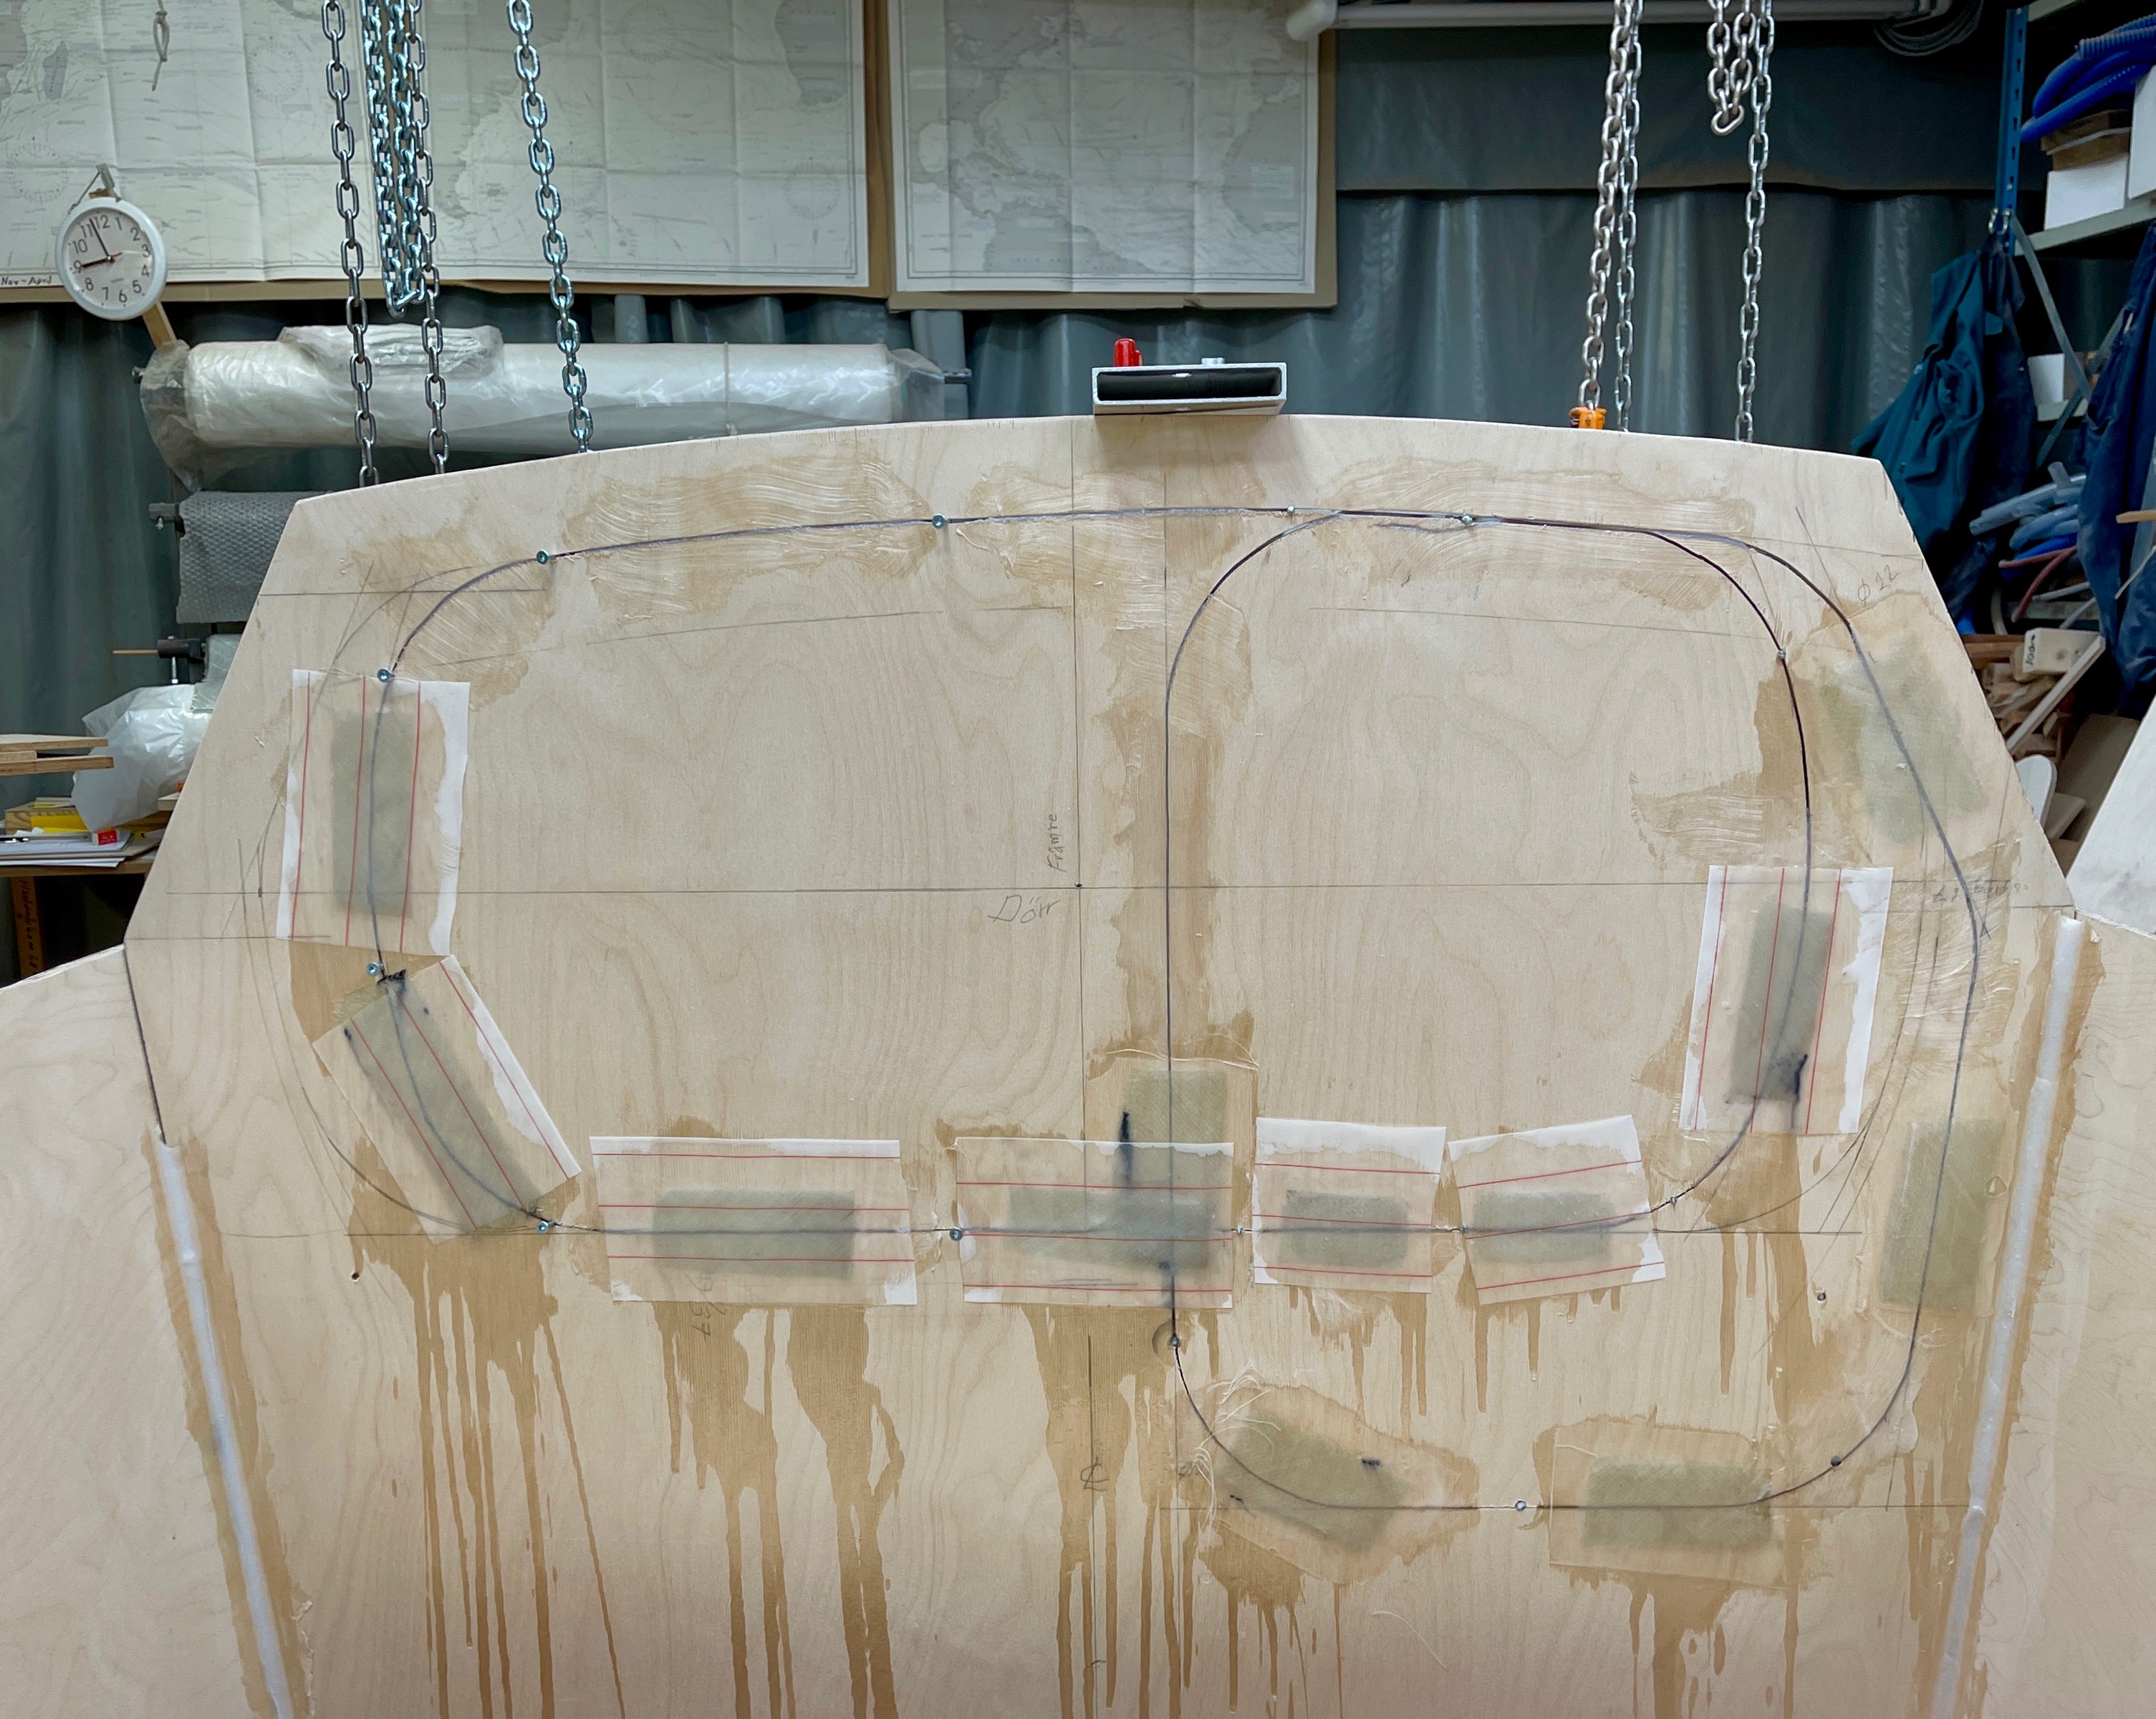
Now I try again. I like to have one line pulling the board up and one line pulling her down. The problem is to avoid that the lines interfer with each other or get jammed. The bigger angle the centerbord is tuned the bigger the problem. To get much useful lateral area I like to turn the centerboard down about 80°. Large lateral area is very useful when slowly forereaching into a gale. I prefer that method to heaving to. You can make some slow progress to windward in comfort.

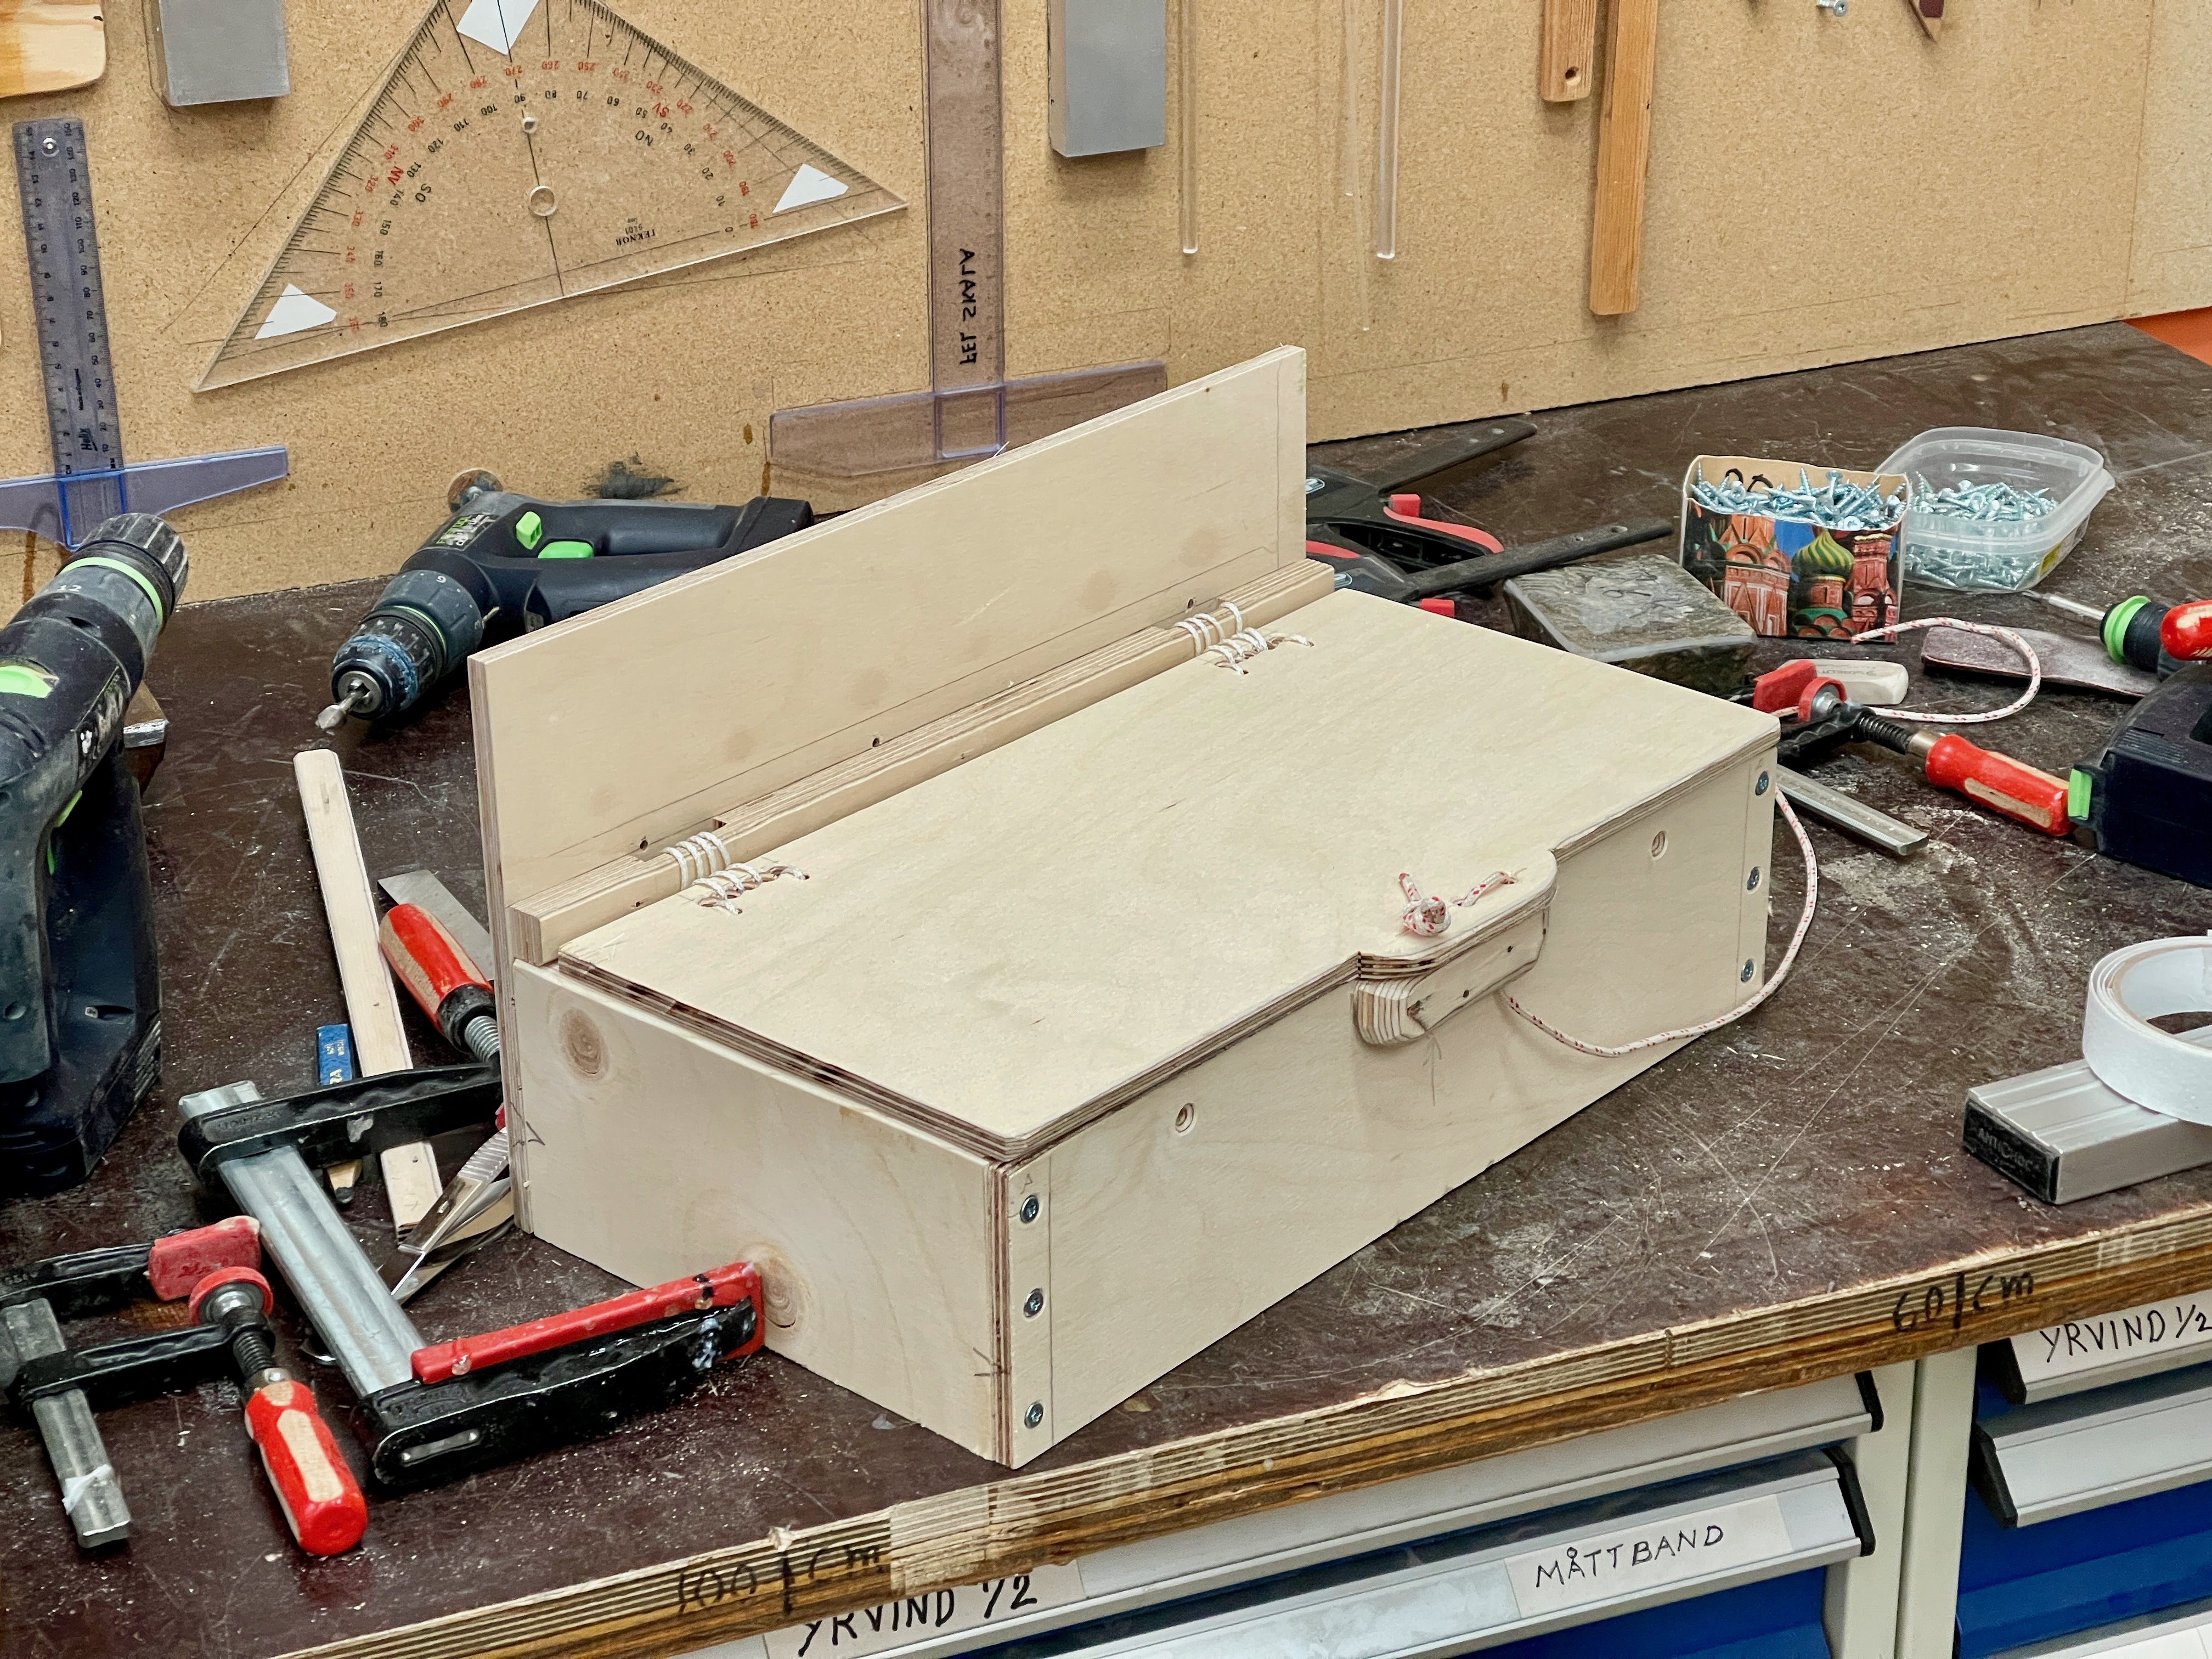
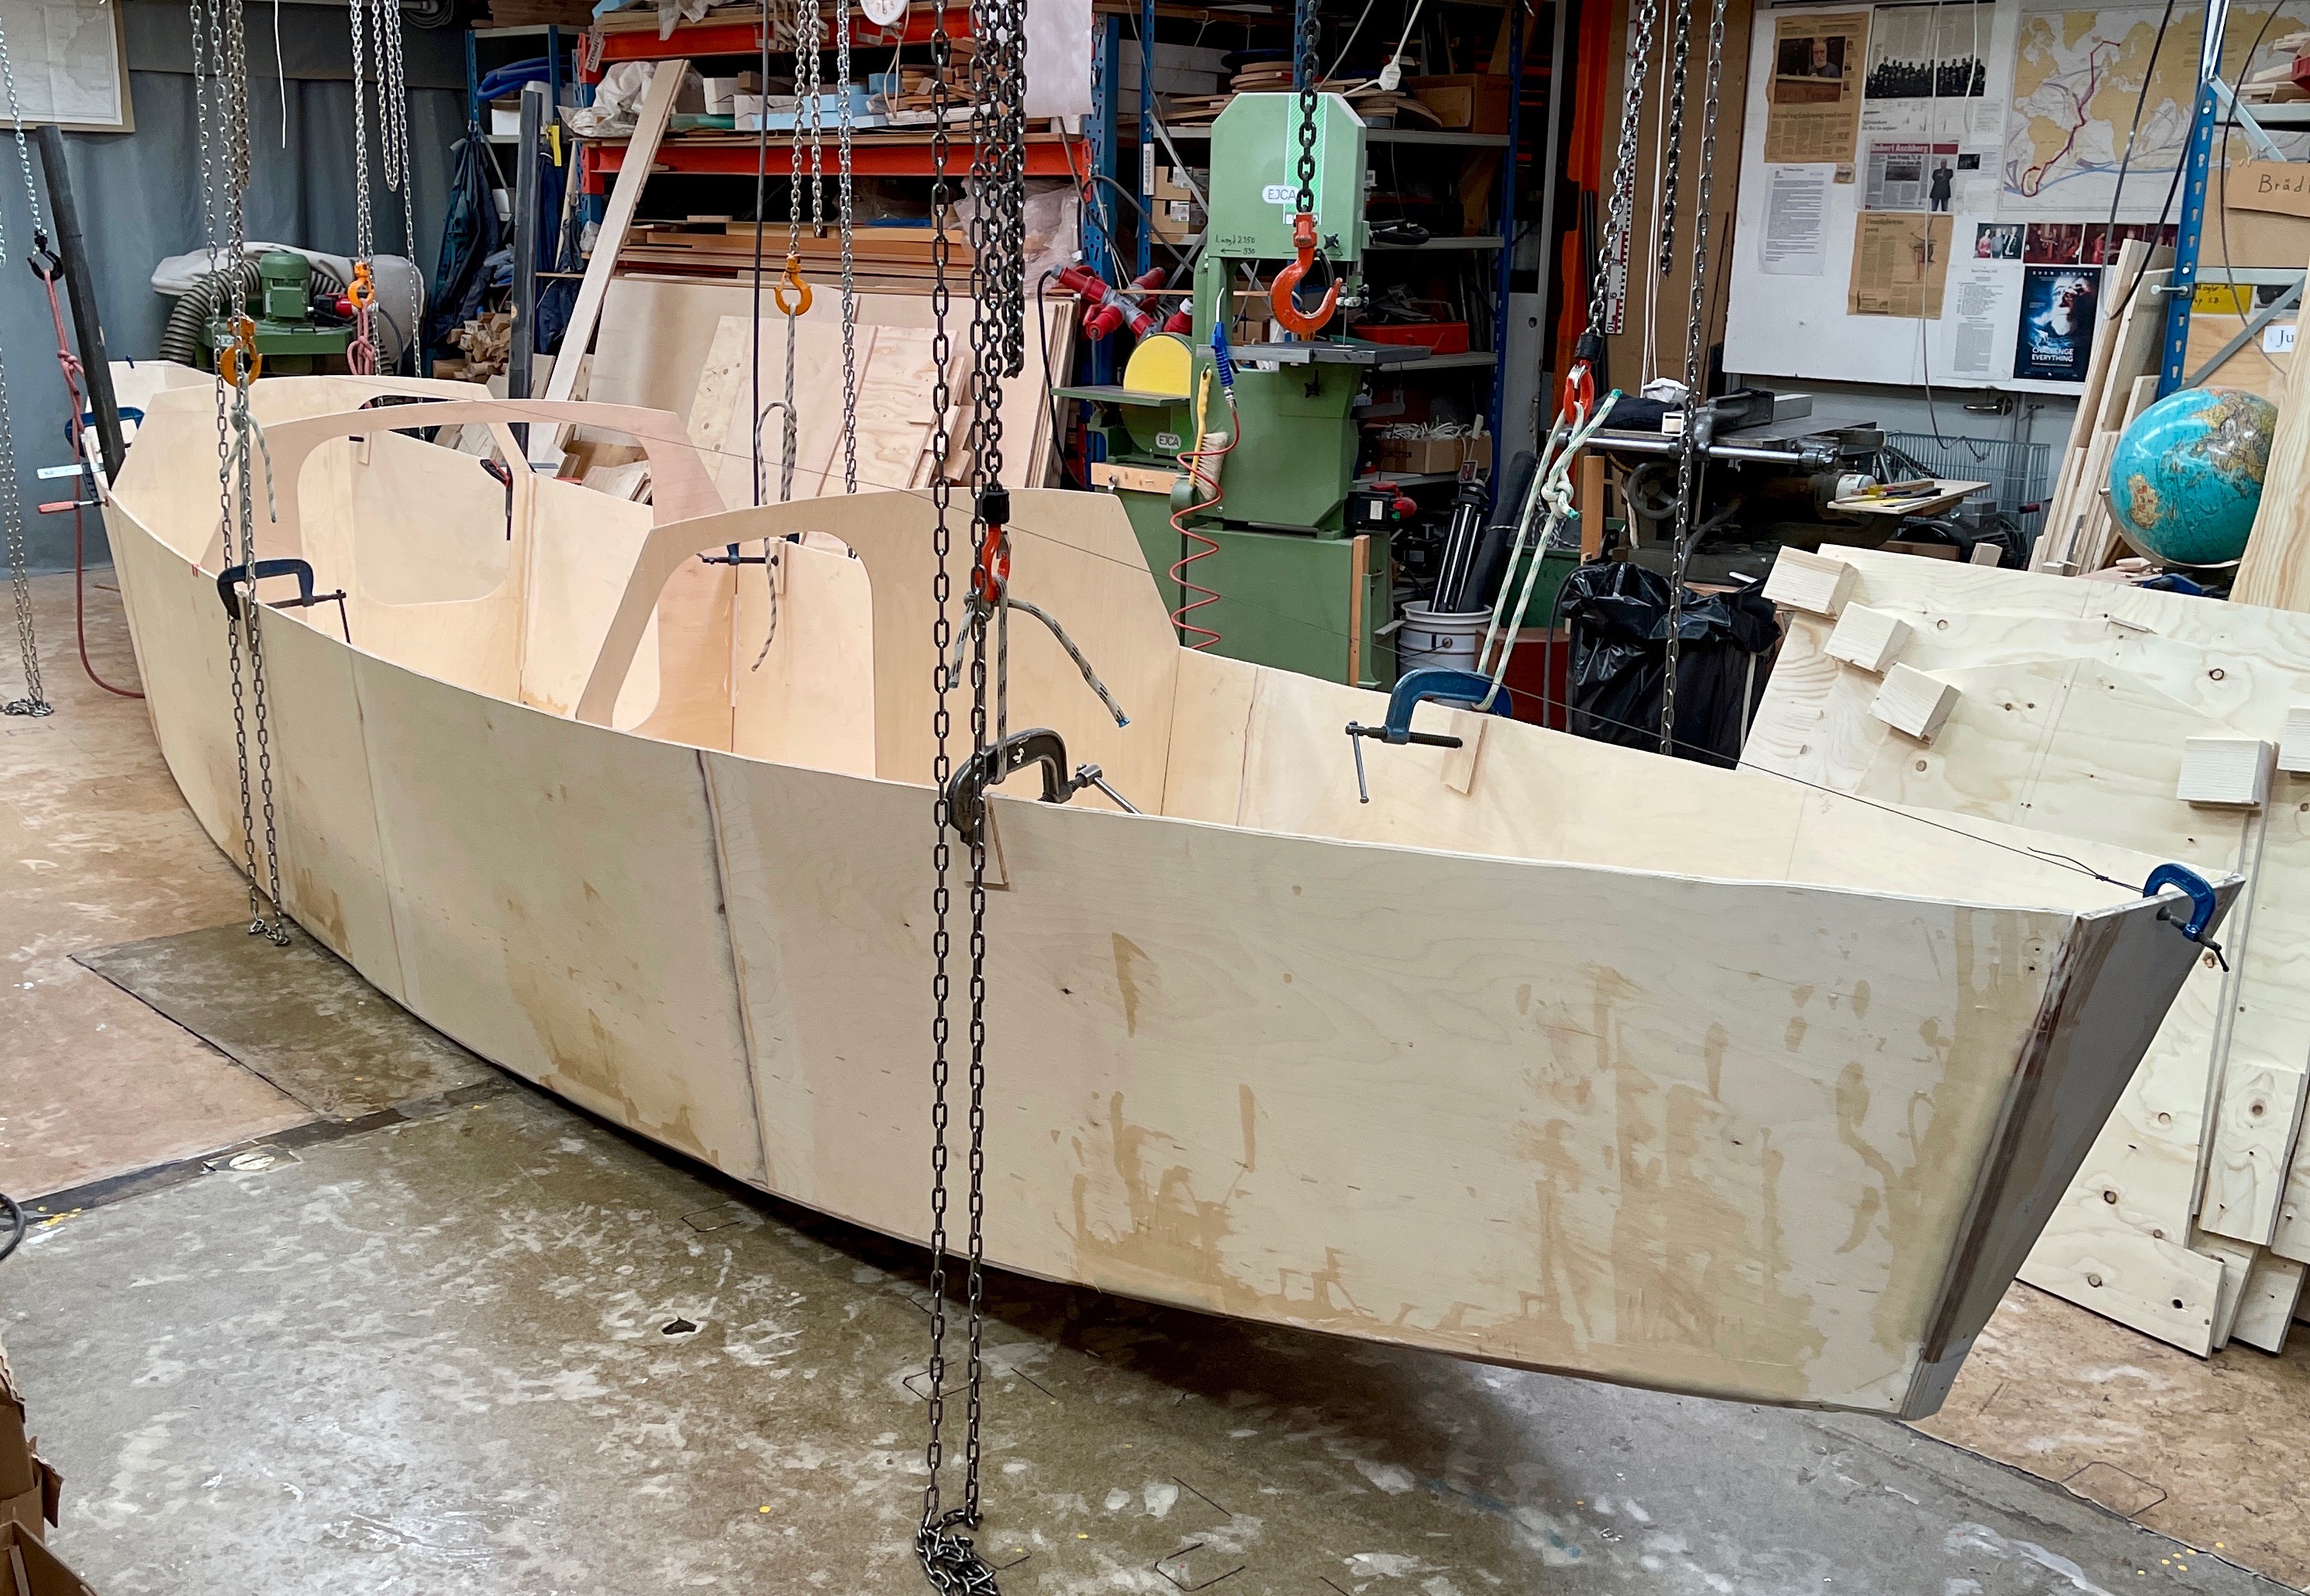
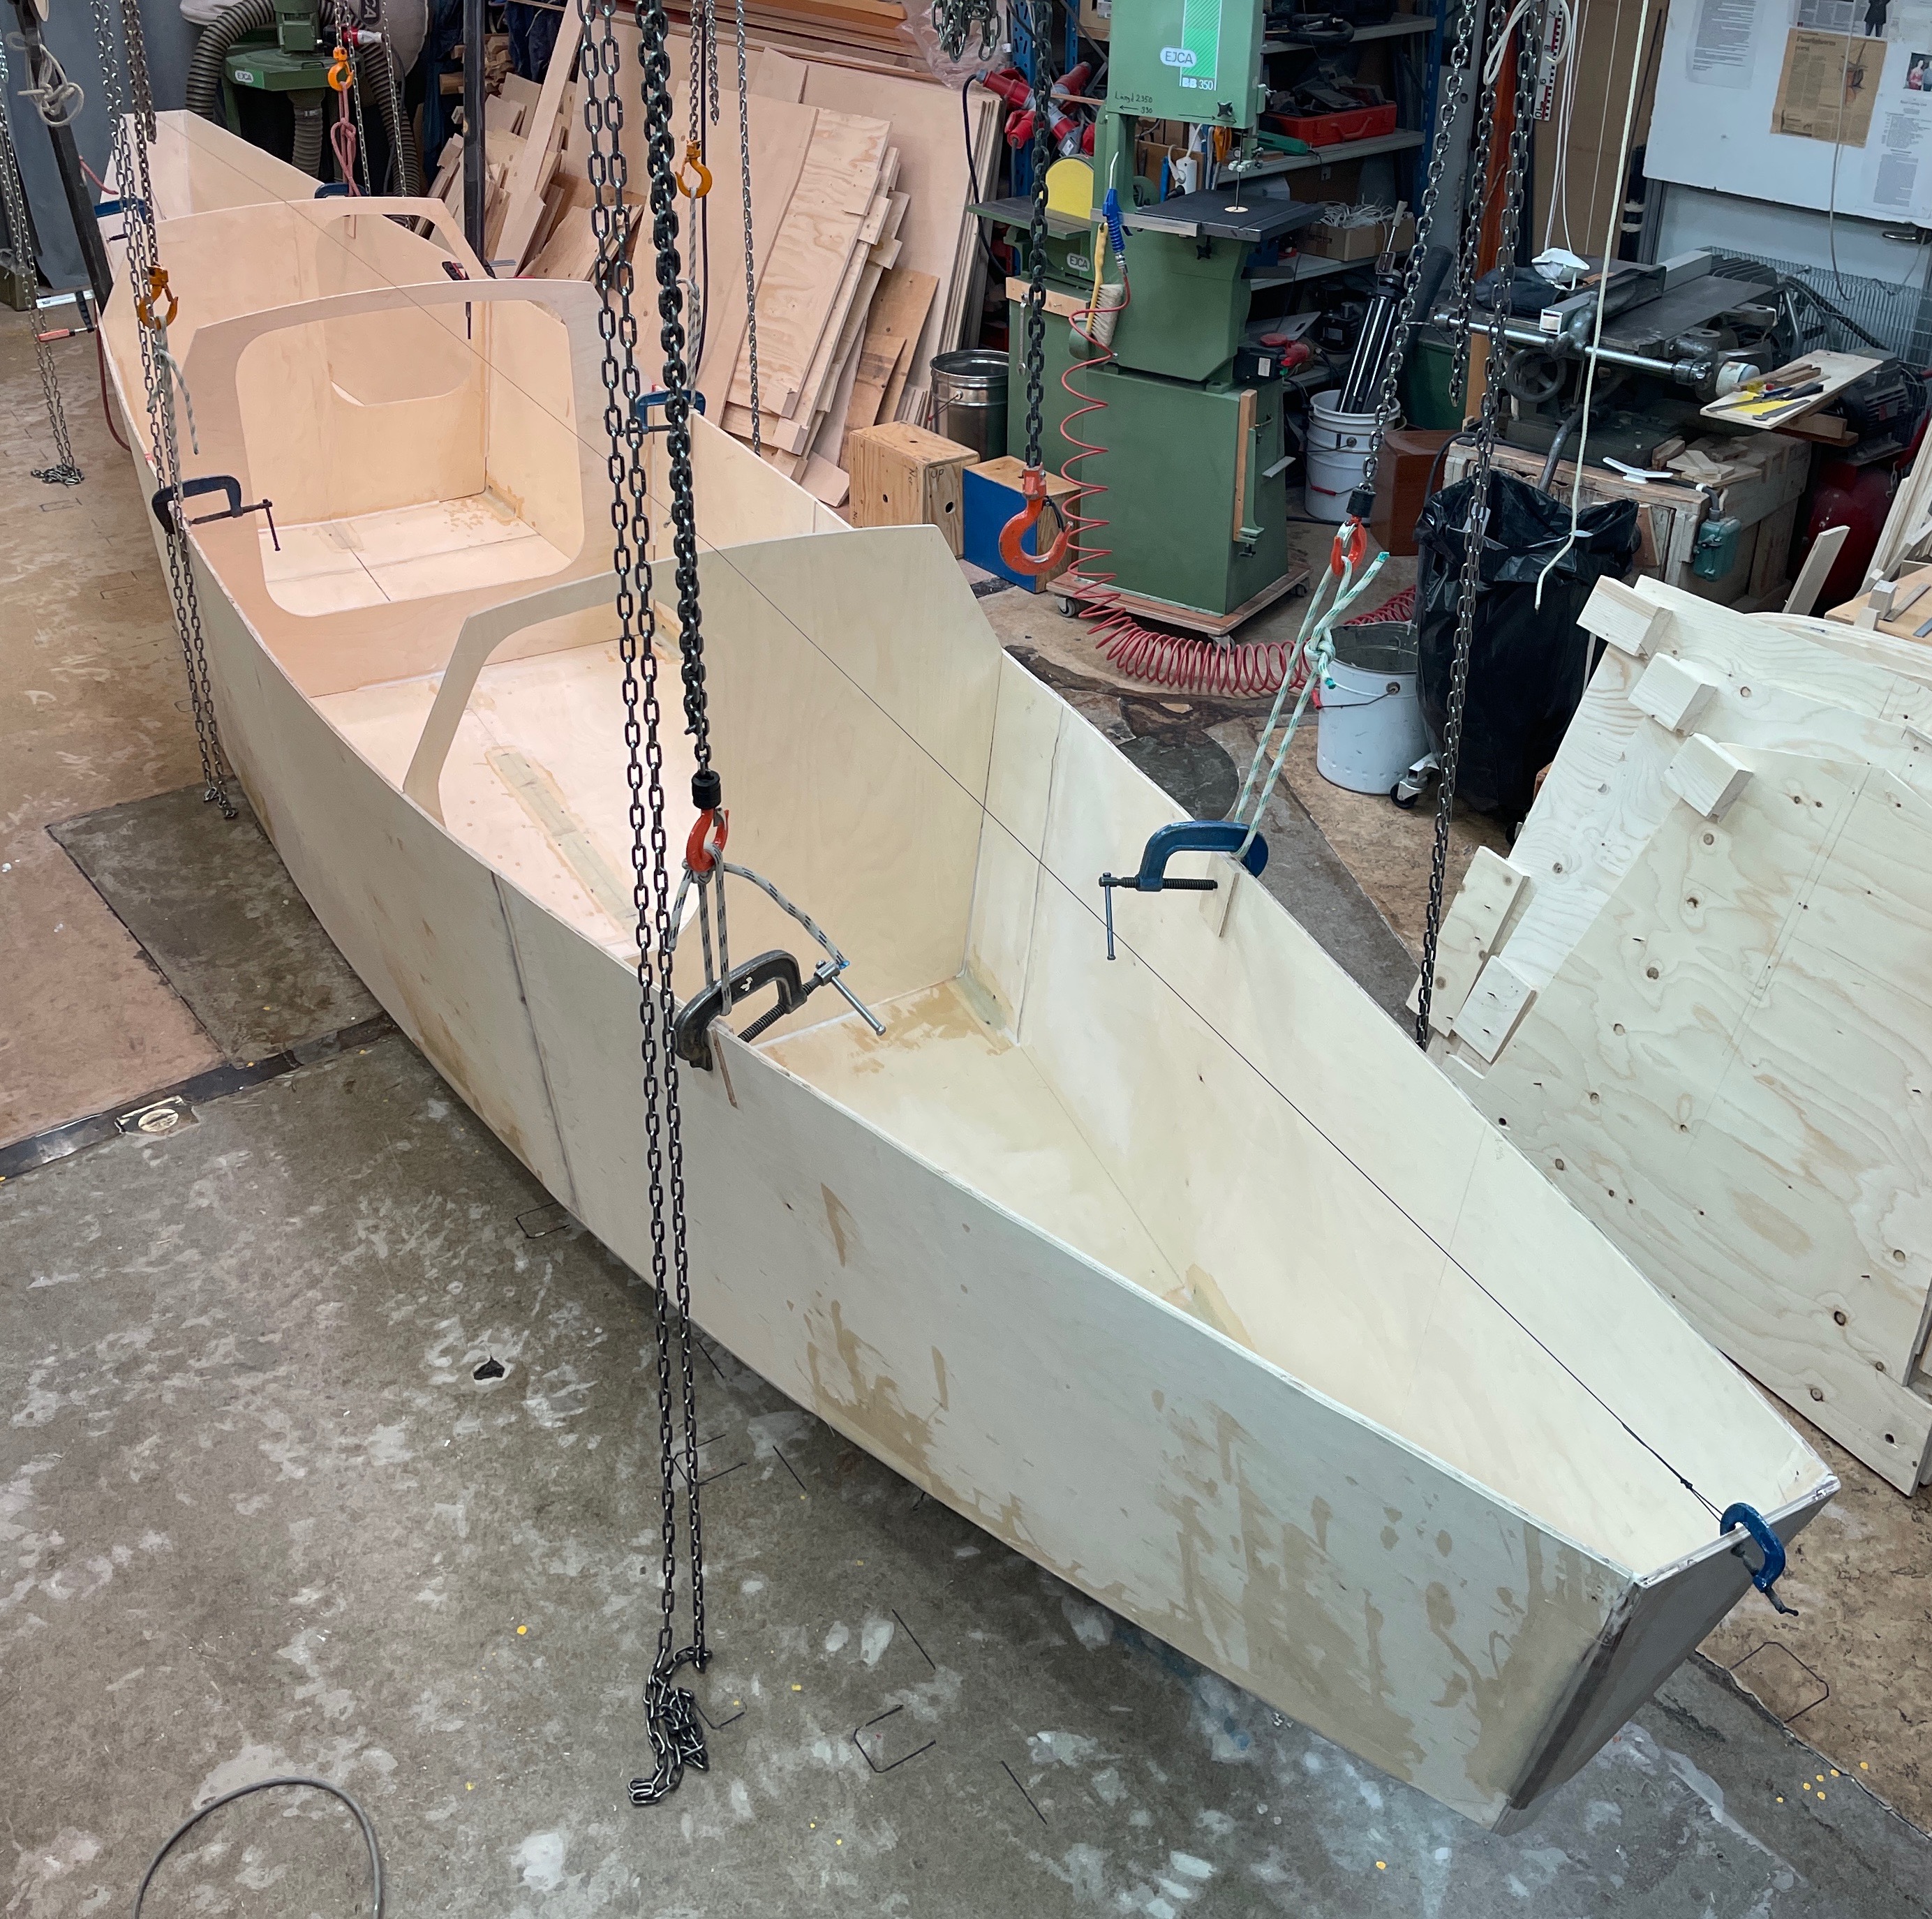
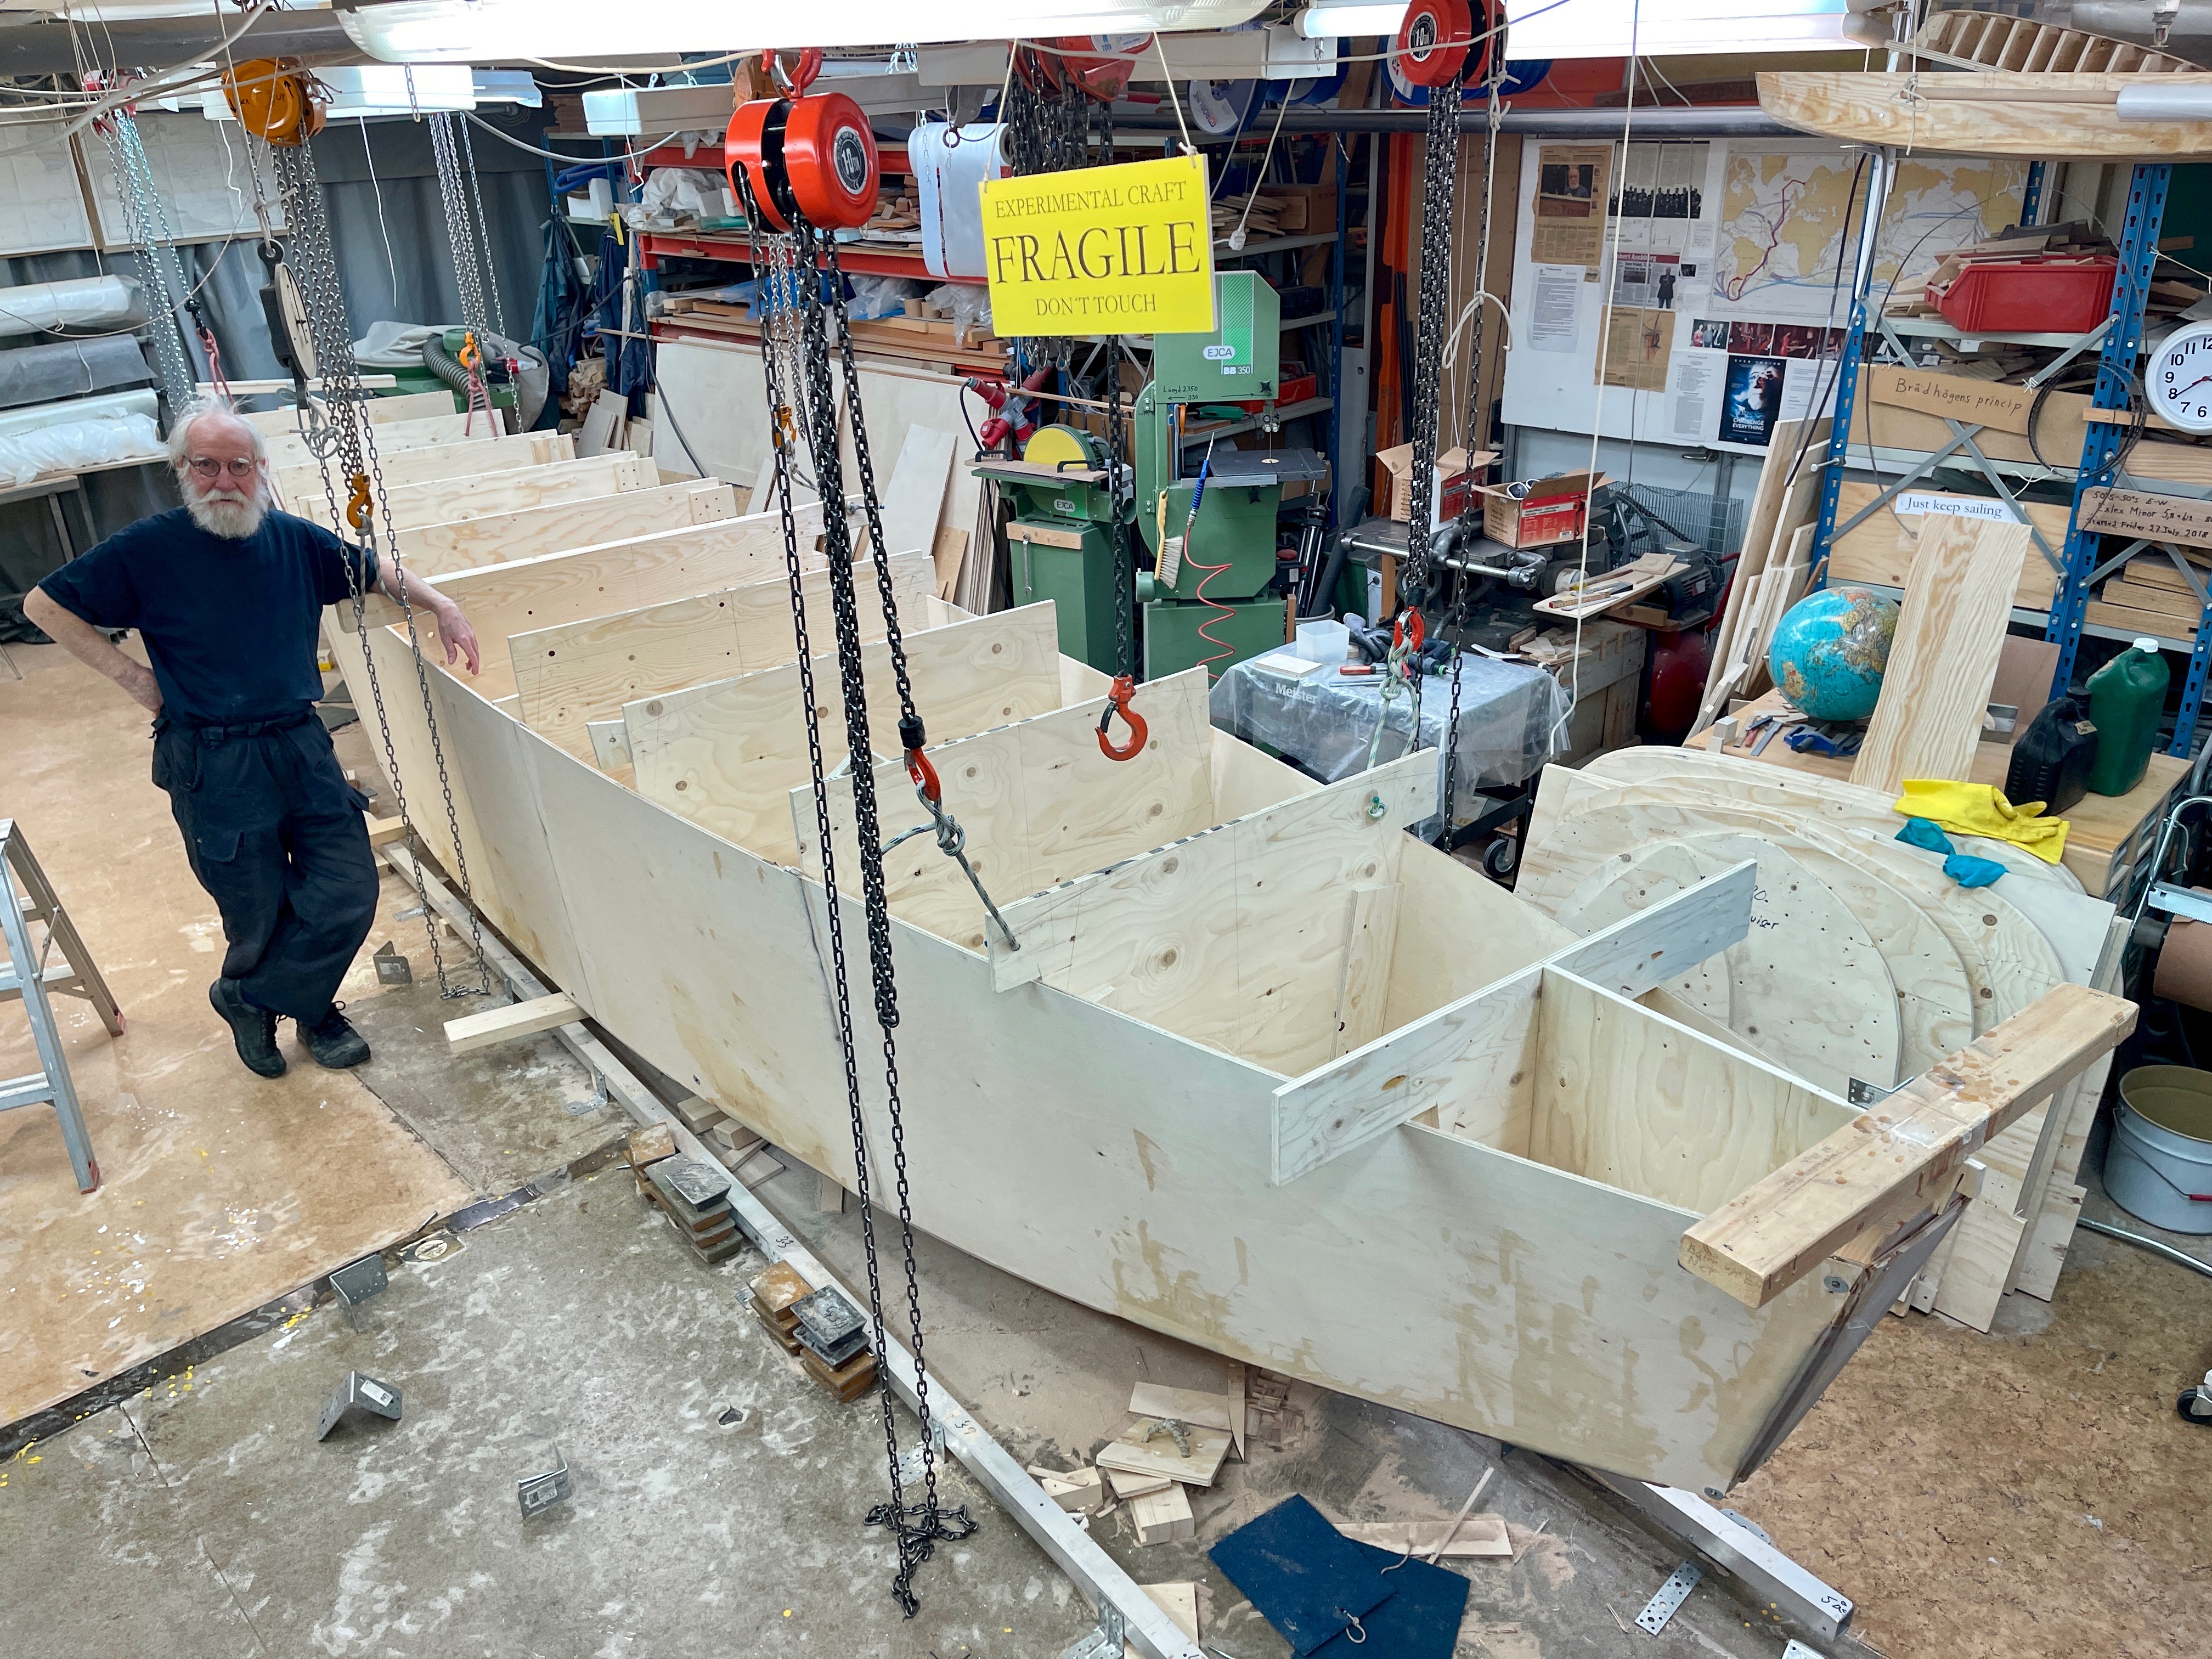
The centerboard case is open at the deck. That way it is possible arrange with a lever to move the centerboard in the unlikely event of the lines breaking. I will use oversize lines. 16 or 18 mm or something like that. Big diameter lines are also less likely to get jammed between the centerboard and the centerboard case.

By being able to turn the centerboard with levers I can attach new controlling lines. Exactly how it is going to be done I have to work out but I have some Ideas. It will be more easy to see as work progres.
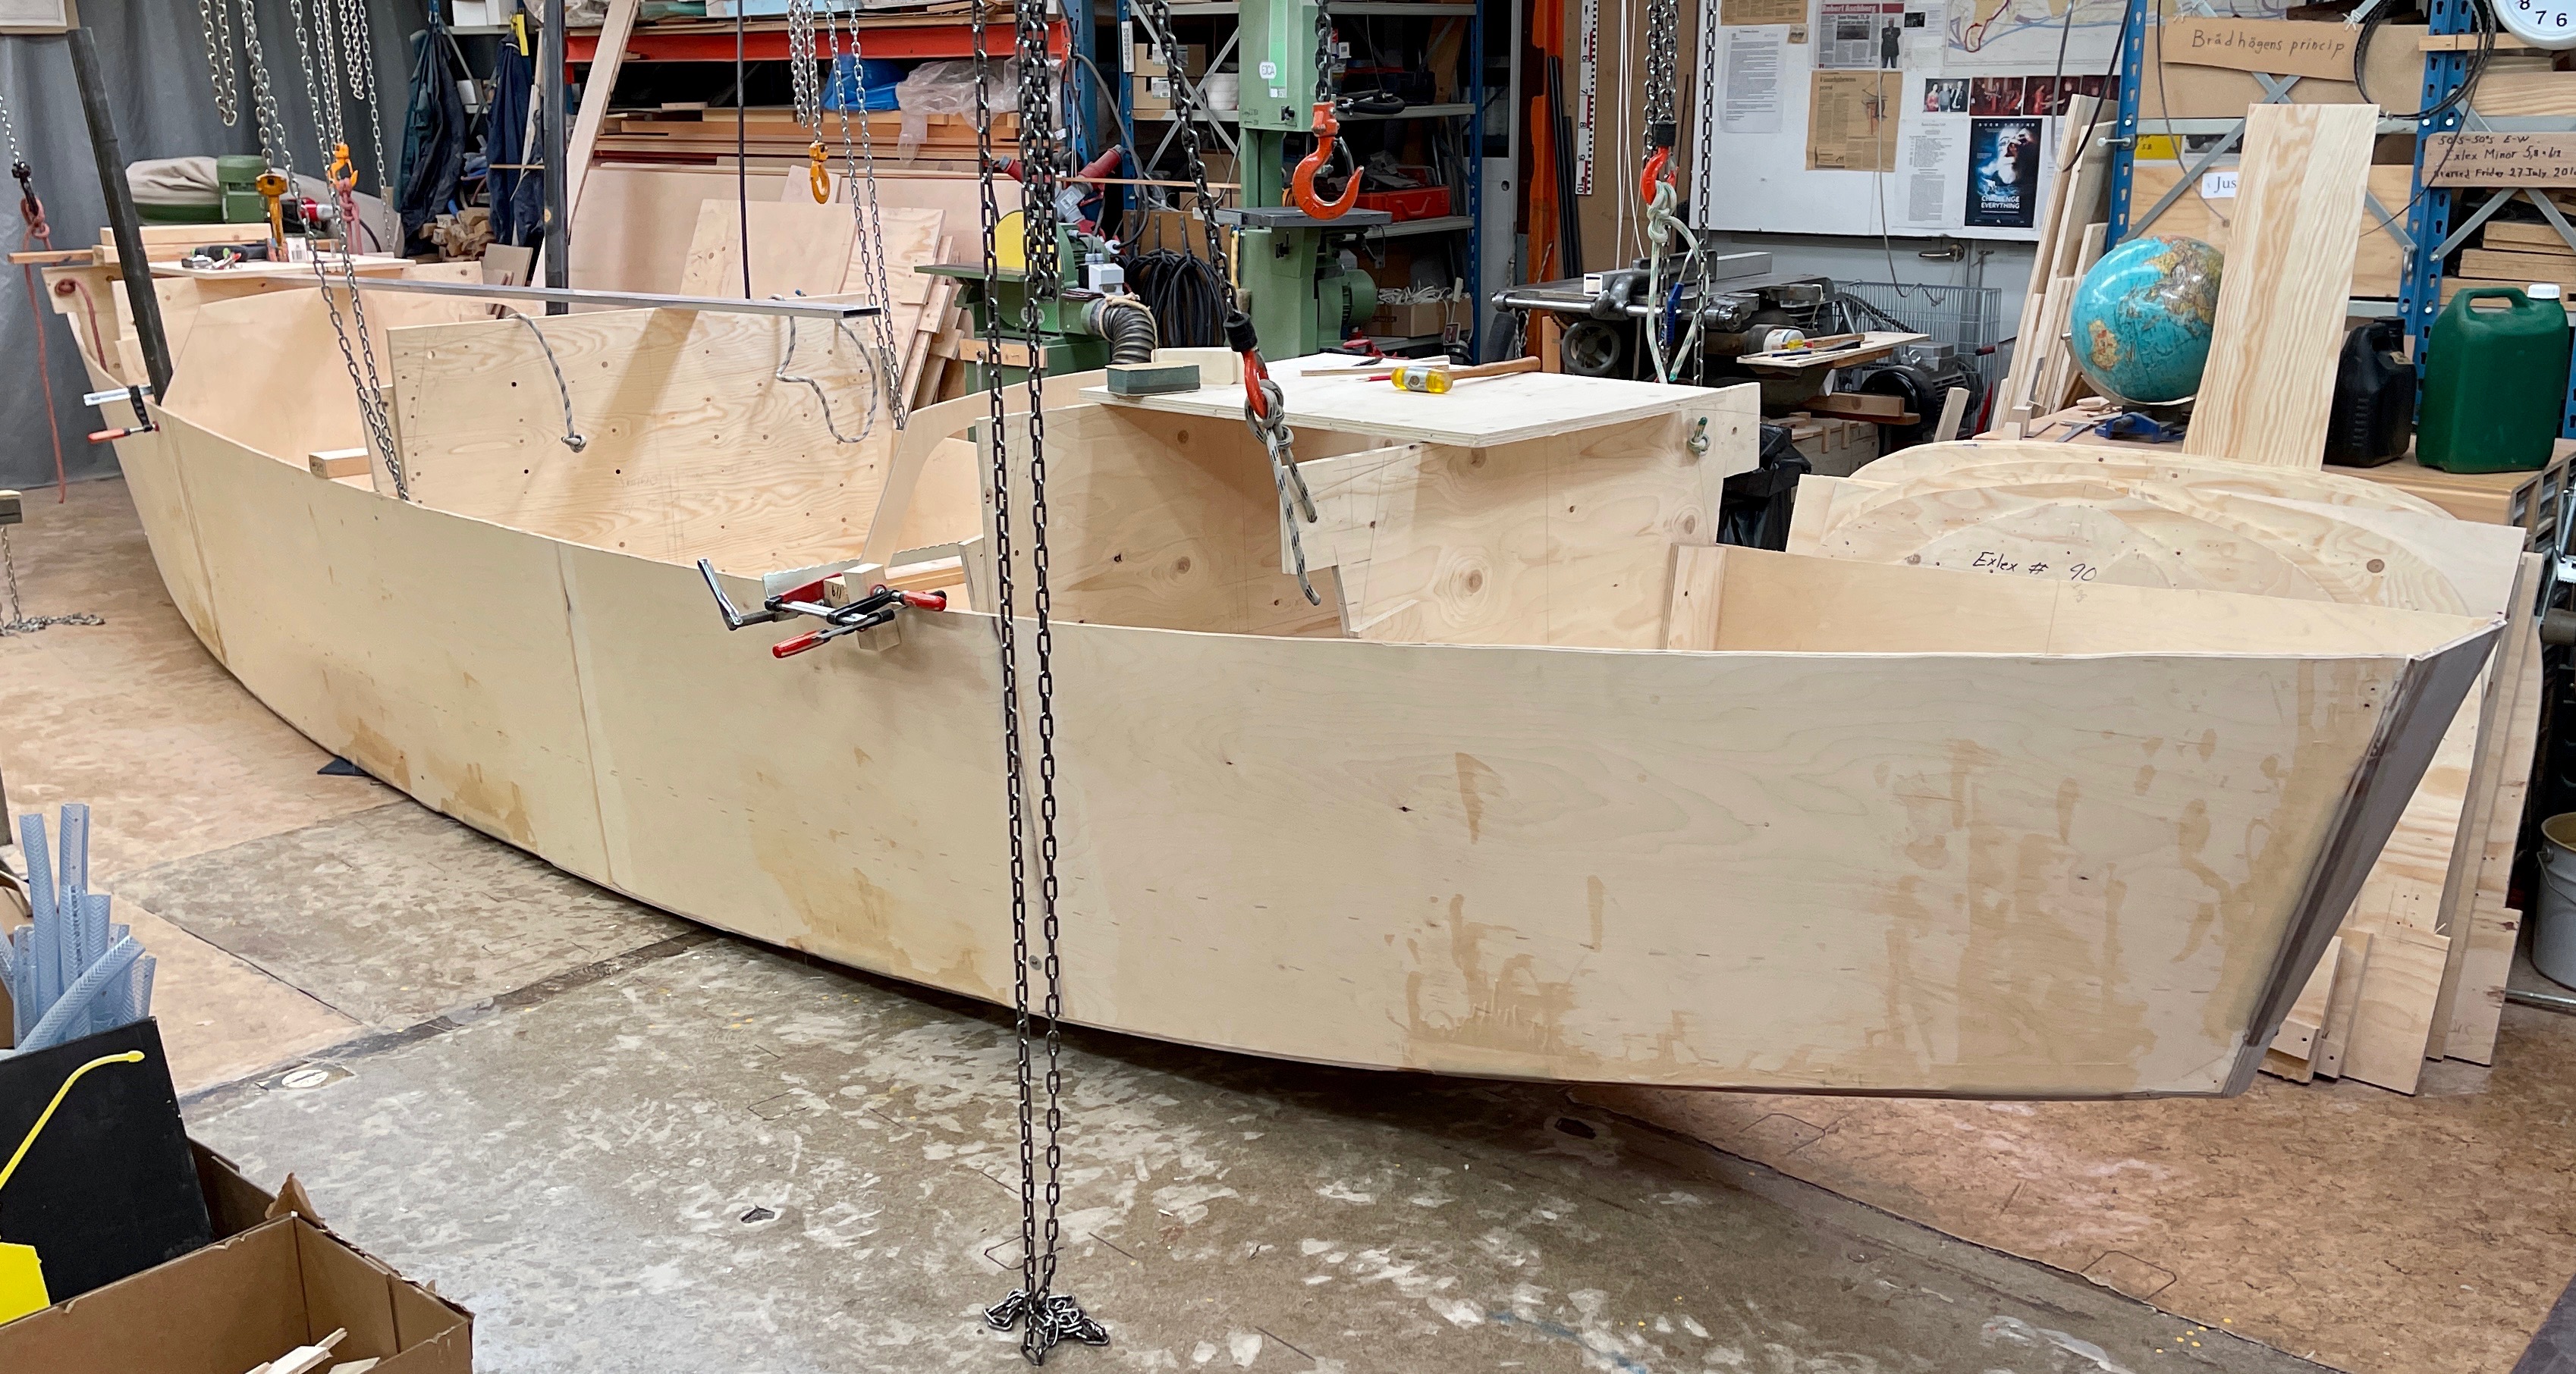
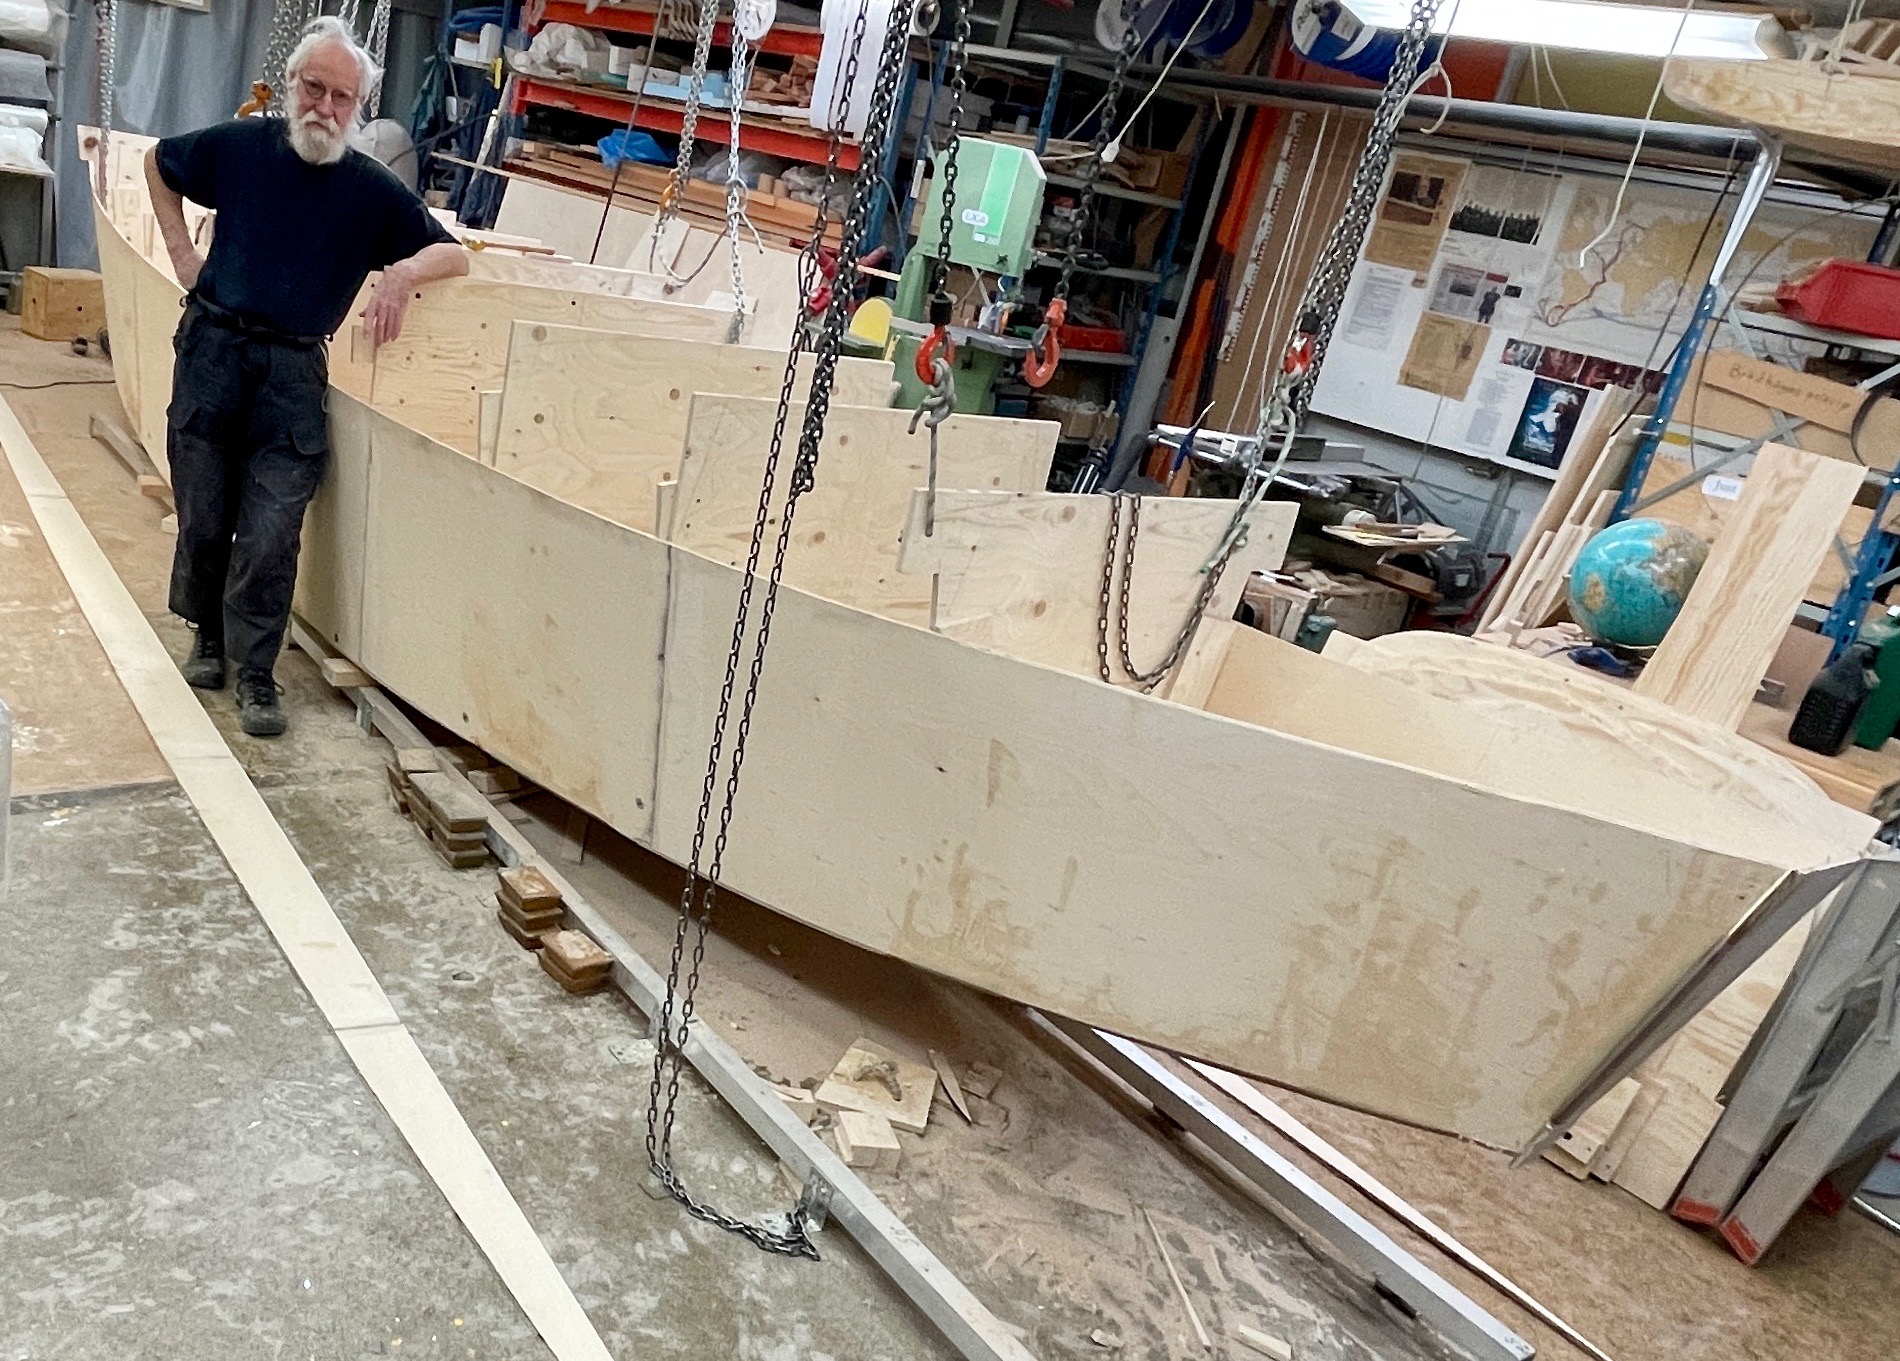
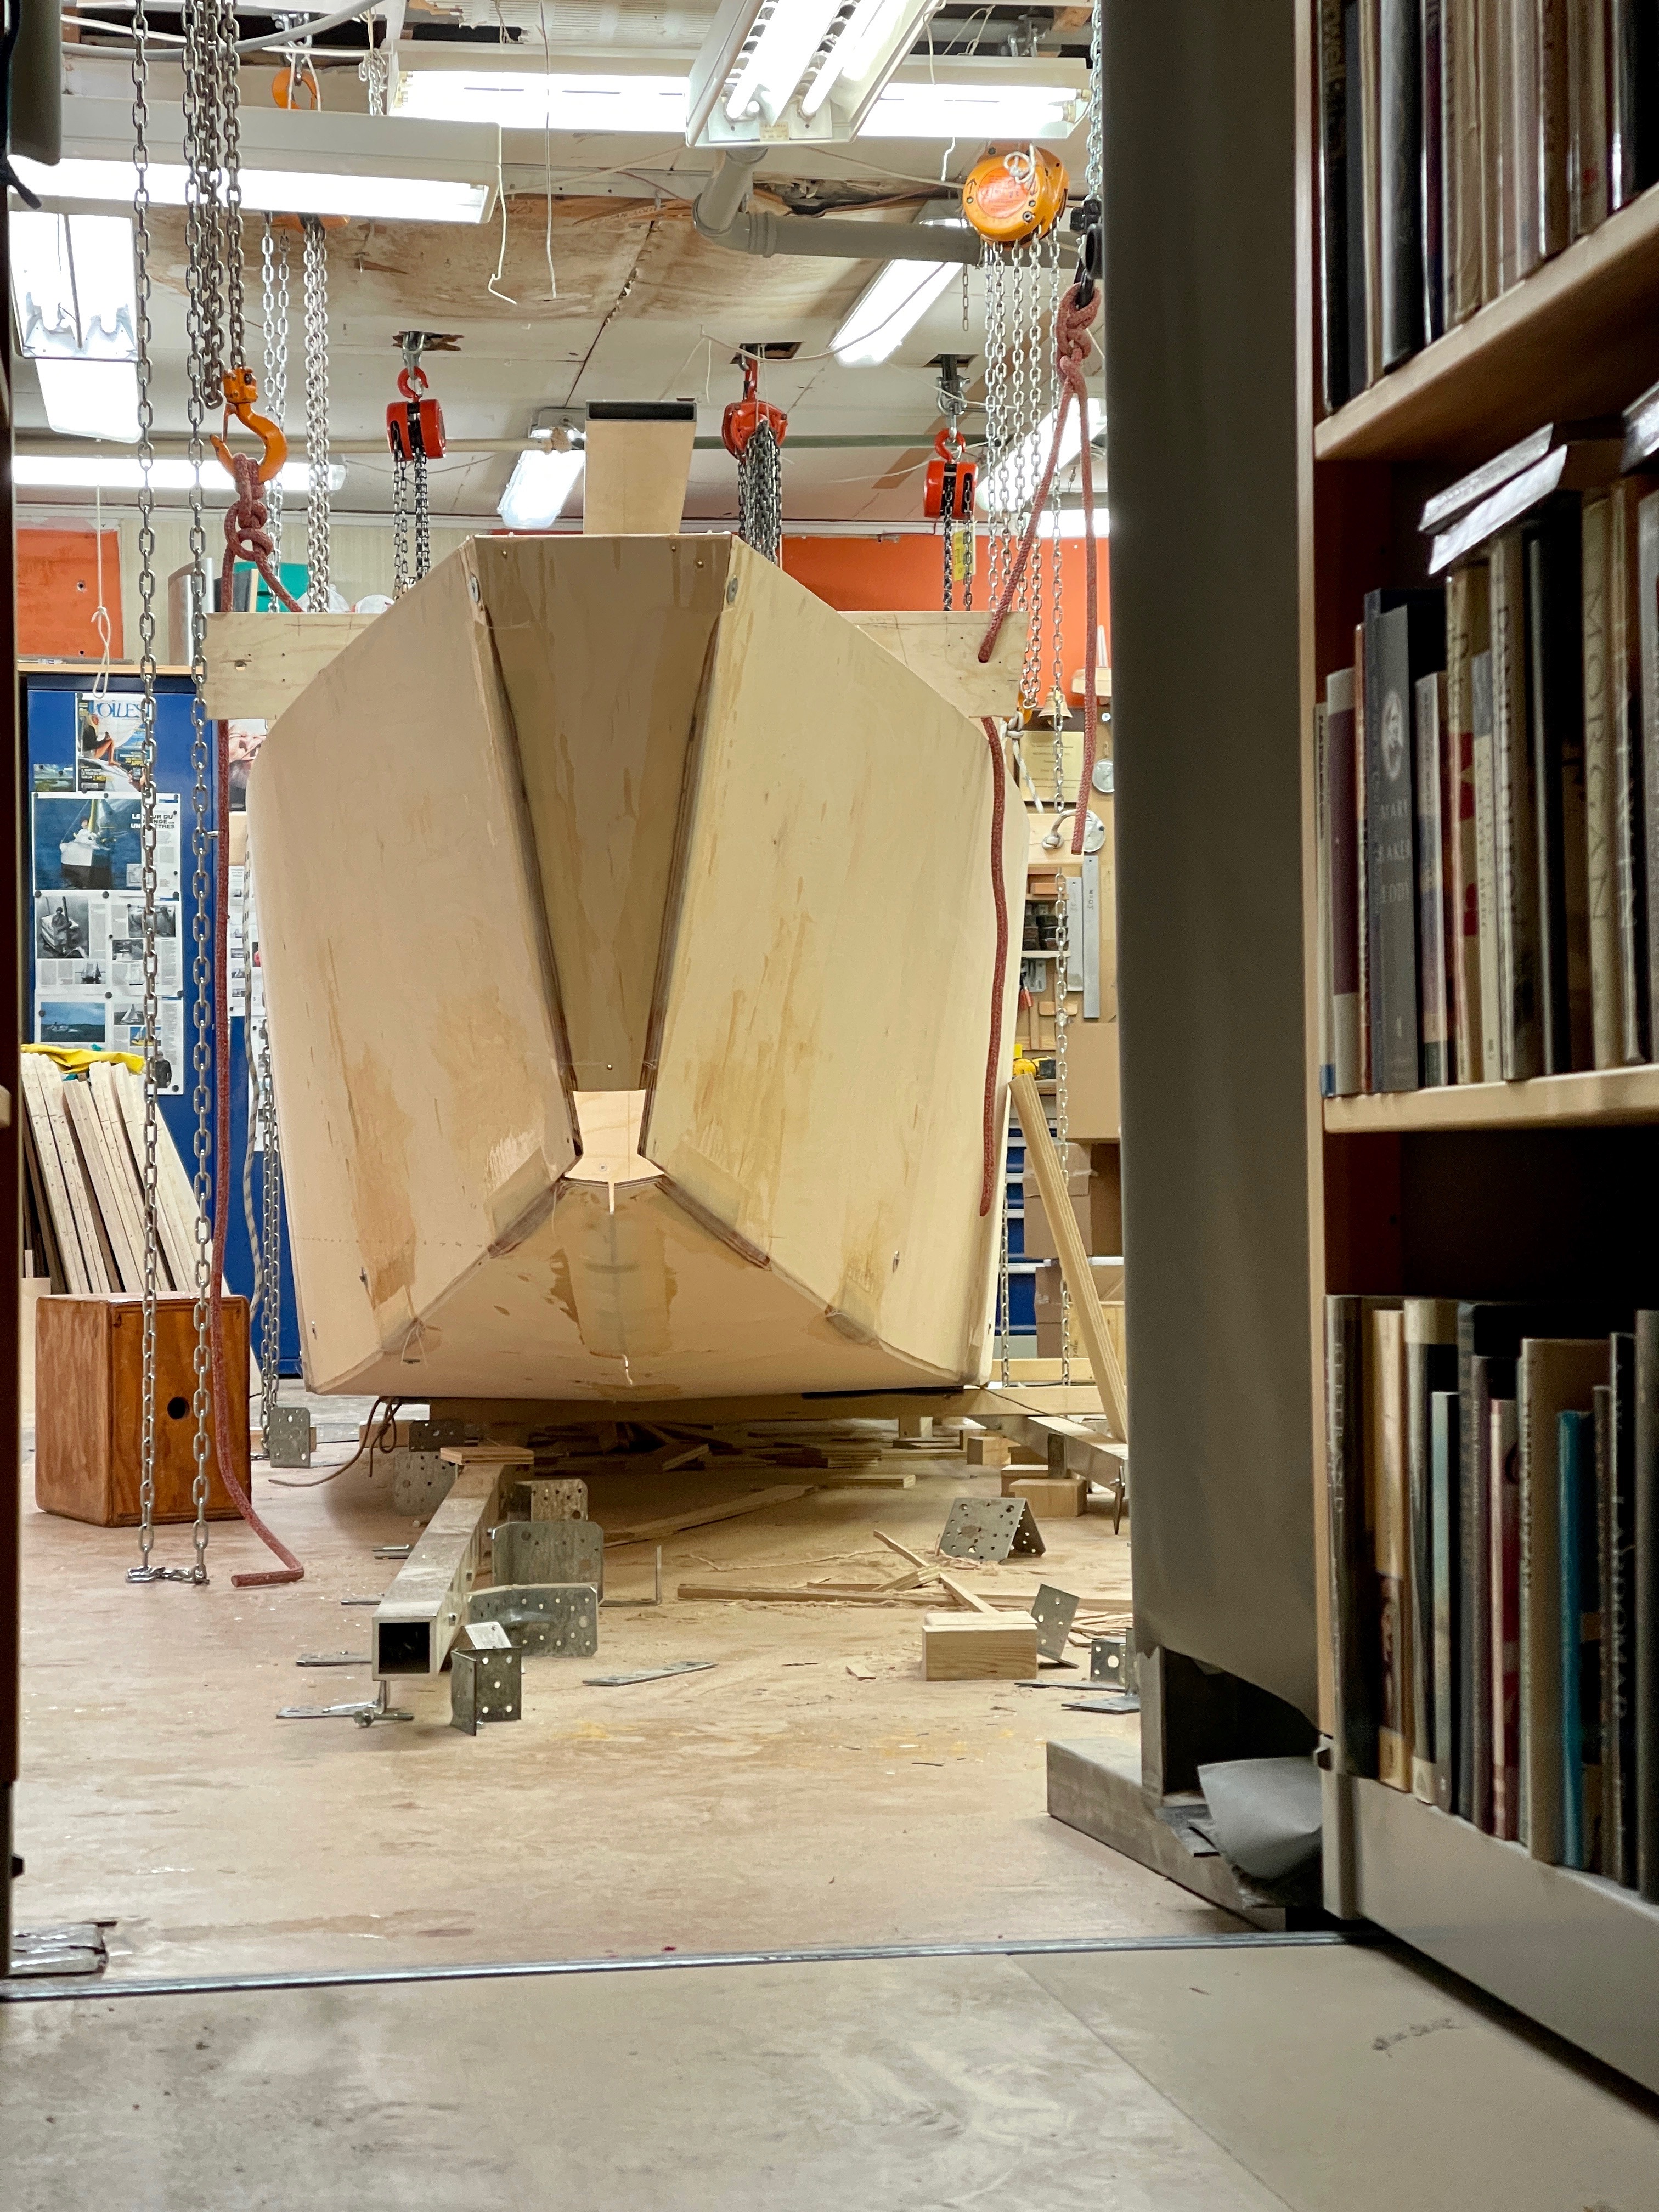
Below is a video.

To be continued…

Regards Yrvind.


YRVIND TRIES TO EXPLAIN HIS CHOICE OF RIGGING

Hi friends.

Here is a video. I will try to explain some of it feuters.

When a boat heels the sail area moves to lee, with that the center of effort and the boat gets more weather healm. With biplane rig if you drop the windward sail the center of effort moves to lee. The boat gets more  weather helm. With a third mast, a mizzen to balance the center of effort stayes the same. Much as with a ketch if you drop the mainsail the jib and mizzen keeps the center of effort unchanged.

1964 I was a member of the Amateur Yacht Research Society. I did build a proa. To balance the sail area to lateral area I moved the sail sidewise to lee or windward untill equlibrium was reached.

Going to windward with a biplane rig is fine because both mast get free airflow like a biplane airplane.

Sailing down wind the rig is very stable and selfstearing with the sails sheated out more than 90°. With freestanding masts there is no chafe if you keep the lugsail on the lee side of the mast.

Two pictures below.

Exlex of 2018 on her way to Madeira. Her beam was 1.04 meter and to narrow. The problem was in port because the masts was leaning outside. Thats why I did not use the side by side biplane rig on Exlex of 2020. Now the problem is solved. I will build tabernacles that can mowe the mast inwards in port.
The track of Exlex of 2018 on her way to Madeira. As can be seen she steered herself just fine. I enjoyed myself.

To be contiued…

Regards Yrvind.

ARRANGING STOVAGE

I am now trying to figure out the best stovage. There is plenty of space in the boat. This means that I have to be extra careful not to fill it up othervise the boat will be to heavy.

I have come up with a system cheap light and functional for locking the hatches. The first idea was with a rope in tension but it was not enough friction in the system despite the capstan equation. I took a walk and used the rope in compression instead. That works fine. I use rope hinges.

Below some pictures of the progress.

The first modell of the hatch lid. It did not work to my satisfaction not enough friction in the rope. Next try in the video. I took a walk and figured out to use the rope in compression using the jamming effect.
Me sitting with my head above the deck. There be a deckhouse wtih a 360 vieuw from the bed and from the saloon.
An unexpected bonus was that I got a neckrest. It was amasingly comfortable. I was also sucessfull with the angle of the backrest and seat.
The first row of jerrycans below the bed, 9 of them 5 liters each. There will be one more row. Also I will have 16 one litre bottles. Plenty for a man that uses one litre water a day.

To be continued…

Regards Yrvind

DOORS

I am mocking up the doors between the inner and outer compartments. The idea of the inner compartments is that they shall stay dray at al times whatever the outside conditions. The outside compartments is for manouvering, tending sails, anchoring, oarwork and such. Those activities will be done from the hatch like the man in the kayak. The inner compartments are for sleeping reading writing navigating deigning and such also the saloon for eating and leasure with a 360° from the deckshouse.

Picture and video.

The bulkhead to the front compartment with centerboard and the side by side masts. First I made a door on the starboard side. Then I realised that the it interfered with the masts. Then I made one traverse with a dropping door. Then I realised that I could make it smaller and lower. I have reduced its size by 5 centimeter less up and down distance and 10 cm vide. It is also 10 cm lower down. I decided to lower the whole deck masts and everything by 10 cm. Now I have found a good balance. Byrålådseffekten is what we call a drawer when it gets stuck because its wider than long. I solved that problem. realising that the stucking is caused by it not moving parallell but twisting and that a diagonal thus making it longer. There is one geometrical figure that do not get vider by rotating, the circel. I thuse made the short ends part of a circel and the problem is solved. I used that idea on previus boats. Its failproof. The door is opened by lowering it. Keeping the door high up also creates a partial bulkhead. Good for preventing water from entering the inner dry compartments.

A video

https://www.youtube.com/watch?v=Yp_GRucd_ps&t=109s
To be continued…
Regards Yrvind…

BOW CENTERBOARD AND RUDDER.

Peter have helped me filming a video showing the rudder and bow centerboard.

The idea was to have a centerboard in the rudder as well and the control lines coming up thrugh the rudder axis. To make it simpler I have increased the depth of the near vertical ballasted chinerunners to 20 cm under the hull. The hull will draw 23 cm at one ton. So total draft will be 43 cm just guessing. That leaves the rudder 3 cm abouve the ground.

Its a spade rudder with a 60+ mm diameter stainless pipe as axis. That axis and its bearings should be more strong than a normal skeg.

The bow centerboard also comes along well. I have found an arrangement for the control lines.

I would have liked to have a deeper rudder. But its a balance between dept and simplicity. Hopefully it will work. If not I change it.

Below two pictures.

The bow centerboard at maximum draft
The rudder. I would like to have more draft to it but if it works it be fine. The way to find out is to try. I must find a balance between draft and simplicity.

If you like my work please donate by the donate button. Corona have stopped me from earning money by giving public talks.

To be continued…

Regards Yrvind.

Exlex the sailing canoe on video

Hi friends. Peter have this afternoon helped me doing a video explaining some features of Exlex the sailing canoe

youtube lets you do comments if I promise not to show the boat for children, they could get ideas. So here it is and it lets you comment.

https://www.youtube.com/watch?v=0tpILI1kJPI

To be contineud…

Regards Yrvind.

HULL WEIGHT

Today I remowed the last mold and weighed Exlex the Canoe Yawl. As the hull now stand with three bulkheads she is 11o kilos. The hull surface is about 17 square meters. Headroom is about 98 cm in the middle of the boat. She have negative sheer by 10 cm.

Below two photos

Aft end facing camera
Closest to camera compartment for rudder and main hatch, mowing forward sleping room, mowing foreward saloon, mowing foreward centerbord and hatch to controol the two 3.6 square meter side by side balnced lug sails.

To be continued…

Regards Yrvind

THE NEAR VERTICALBALLASTED CHINERUNNERS

First. I hypothesize that chinerunners work as deflectors, not as hydrofoils. Deflectors are concave surfaces that redirect what hits them. According to Newtons third law the more water the chine runner deflects to lee the more the boat gets pushed to windward. When the boat is heeled, the hullside together with the chinerunners creates a lot of lateral area.  Unlike the ordinary keel I think the Bernoulli effect plays no significeint role here. This may explain the chinerunners remarkable efficiency and why they are so misunderstood.

Second like bilgekeels they protect the boats bottom at low tide.

Third they let me put the lead ballast a bit lower.

Forth they keep the lateral resistance high up those decreasing the heeling moment. Everyone realizes that a sail center high up heels the boat more than a low one. Not every one realizes that a lateral area high up heels a boat more than a lateral area deeper down.

Fifth the chinerunners reduces rolling.

Sixt It is likely that they prevent that turbulence a nd vortices are created along the chines thus reducing resistance.

Seventh. As the boat heels so much that the windward chinerunner lifts out of water the volyme of the windward chinerummers now mowes to lee and becomes boyancy in the lee side thuse creating extra rightning moment kind of like a submerged trimaran that lifts its windward float. The effect is not big but it helps.

Its the combined advantages of the many small advantages that makes me chose them. If at all time you can increase your efficiency even by a small bit, in the end you be doing good.

A wave deflector for a kayak. It keeps the paddler more dry in waves.
Dravings of a seawall wave deflector. The wave deflector keeps the land more dry. The wave runs up the sloop and is returned to the sea.
Drawing from my notebook. The chinerunners be 10 – 15 cm deep and each will have maybee 40 kilo lead.
The chinerunners be about 1.2 meters long. They will supplement the bow centerbord.
A photo from today. Aft end clos to the me. The hull is symmetrical.

To be continued…
Regards Yrvind.

CUTTING THE SHEER LINE

I did the line with the help of a laser beam. I heeled the boat 22.5°. That is easy on a small boat especially if you have 6 chain hoists above.
Finding sheer with the help of an inclined plane is nothing new. I guess its been don for thousands of years with the help of a string and a stick on the stem and stern. Just angle the sticks to the desired degree. This has the advantage that on a bigger boat you do not have to heel her.
At the same time I did a sheered waterline.

Below are pictures.

Marking the sheer with the help of my laser beam. Exlex is heeled 22.5° The laserline is weak in the good workshop light. Click once or twice to enlarge.
The pice on the floor is the cut of. Exlex now have a more nautical look. With less freeboard it is also more easy to work on her inside from the outside.
The bow of Exlex photographed from my book archive.
With the boat on even keel I have made some small adjustment to my drawing. The mizzenmast is mowed 30 cm aft. The bow compartment is 10 cm longer to 2.5 meter. The aft compartment is 10 cm shorter to 1.9 meter. The bow centerbord is changed. In the main she is as planned.

To be continued…

Regards Yrvind

THE HULL ON EVEN KEEL

The hull is now on even keel. I know that the result of the operation might as planned because the hull was only fastened to the molds at the bottom. I did the lifting by the molds as can be seen in the first picture if you click to enlarge.  I did shape the hull by eye to get a good shape did not follow the molds to closely.

In some places there is distances of several centimeters between hull and mold. The hull have to my eye nice harmonic shape. I liked to have a look inside before commiting myself. But it is not strong very wiggly. It will be strong later.

To get more controol and increase my chanches of a positive outcome I bought 2 more chainhoists.  I now have six in total.  3 on each side. When I turn the boat left becomes right and I have to change attachment points. Now with 3 on each side I can take the load on the middle or the outer when I shift. The boat is now 2 meter longer and many times she will have to be turned around. It have never been soo easy as today. I good investment I think.

2 pictures below.

It is difficult to see the shape due to the many molds still in the hull.
The idea of this picture is to show the space between the molds and the planking. The molds are only attached to the bottom of the hull. All went well. Still I do not know how close I was to dropping the hull.

To be continued…

Regards Yrvind